You can create an added layer of organization and customization to your inventory by adding categories and subcategories for your tools and equipment.
In this article, we'll show you how to add categories and subcategories in ONE-KEY™ on Android, iOS, and web.
You can select any of the below bulleted items to be taken to the corresponding section of this article where we discuss each of them:
- Learn how to add categories and subcategories on Android
- Learn how to add categories and subcategories on iOS
- Learn how to add categories and subcategories on Web
Get Started on the One-Key Mobile App or on Web
- Launch the One-Key app on your mobile device or in your web browser.
- Your inventory will load by default.
How to Add Categories and Subcategories on Android
Note: The screens featured in this article may appear different than what you see on your device due to different phone manufacturers having different procedures.
In this section, we'll show you how to:
- Add categories.
- Add subcategories.
- Add existing to a category and subcategory.
- Add new items to a category and subcategory.
Navigate to Categories
- At the top righthand corner of your app screen on your mobile device, you’ll see a clipboard shaped icon. Tap this button to get started.
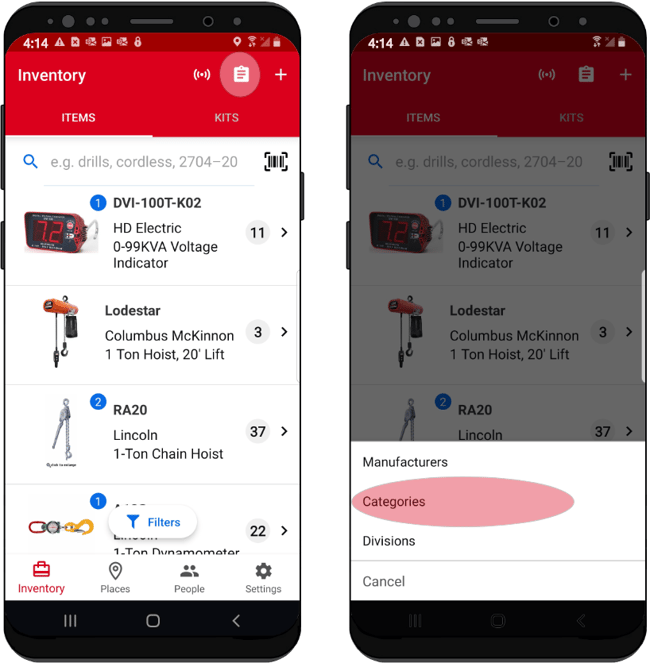
- This will open a dropdown menu of options you can select. Select “Categories.”
1. How to Add Categories
- You’ll be redirected to the Category screen. Once here, tap the + shaped add icon to add a new category.
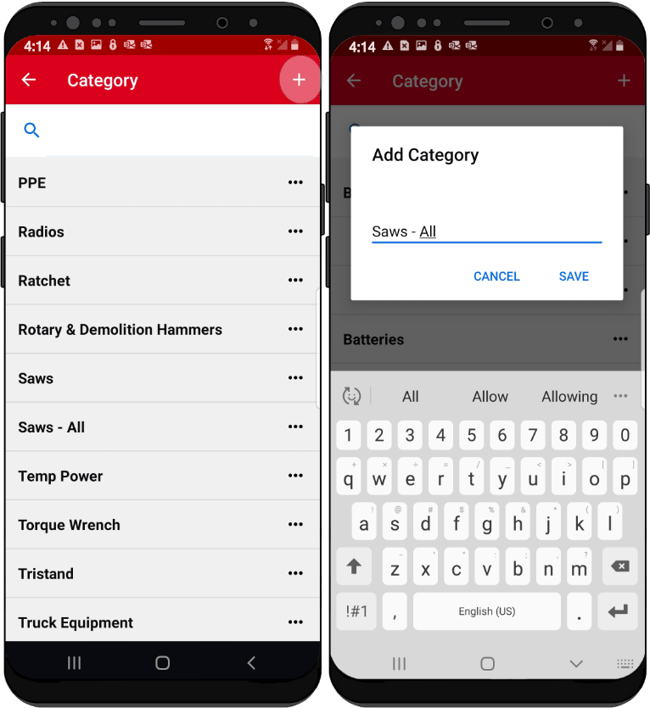
- Use the provided text box to add your category, then tap Save.
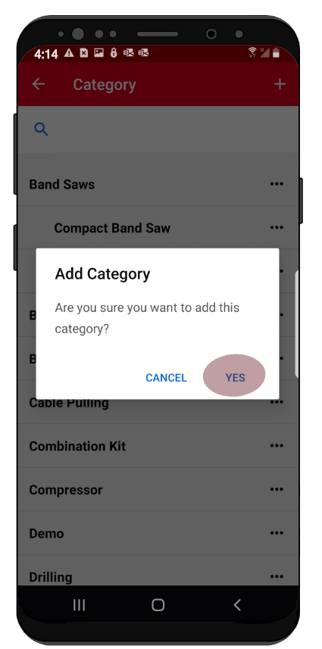
- You’ll be displayed a confirmation message, asking you if you’re sure you want to add your category. Tap “Yes” to log this new category in your inventory.
Your category has been saved and you will now be able add existing or new items to this new category for an added level of organization.
2. How to Add Subcategories
Now that you’ve added a new category, let’s show you how to add a subcategory to this category to this category for one layer further of organization.
- Navigate to your “Category” list from inventory by tapping into on the same clipboard shaped icon in the upper righthand corner of your screen.
- Scroll your list of categories to find the category you want to add a subcategory to.
- Once you’ve found the specific category you’d like to add a subcategory to, select the overflow icon beside this category. This will prompt a dropdown of a few options.
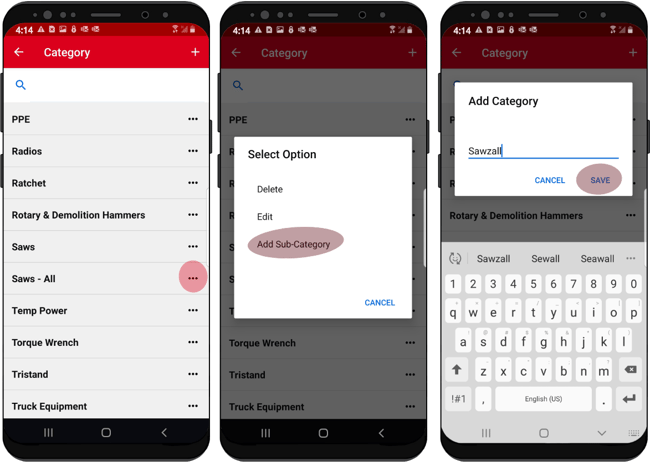
- Select “Add Sub-Category” to add your subcategory to this main category. A text box will similarly pop up, so use this to name your new subcategory, then tap Save. You’ll be displayed a message, asking you if you’re sure you want to add this subcategory to your inventory. Tap Yes.
Your subcategory has now been saved and you will now be able to add existing or new items to both this subcategory and its main category, for added classification.
How to Organize Existing and New Items by Category and Subcategory
Now that you know how to add categories and subcategories, you can now organize both existing and new inventory by the category and subcategory that best describes them.
Let’s show you how.
3. How to Categorize and Subcategorize Existing Items
- To categorize or subcategorize one of your existing items, navigate back to Inventory.
- Scroll your inventory and find the item you’d like to categorize and subcategorize.
- Click into your item’s details.
- Once on your item’s details screen, tap the blue pencil edit button beside its name and description.
- Once on the Edit screen, select the Category option near the middle of your screen.

- Once on the Category screen, scroll your categories and assign your existing item to a category or subcategory simply by tapping the category, then tap the back button to go back to your item’s details, where you’ll see the category and subcategory updated.
Your changes have been logged and you can now search for this item by category and subcategory.
4. How to Categorize and Subcategorize New Items
- To categorize and subcategorize one of your new items, you can do so in the process of adding it to inventory, whether it’s Milwaukee® tool, or a tool or piece of equipment from another manufacturer.
- To do this, navigate back to Inventory.
- Once here, tap the + add icon at the top righthand corner of your screen.
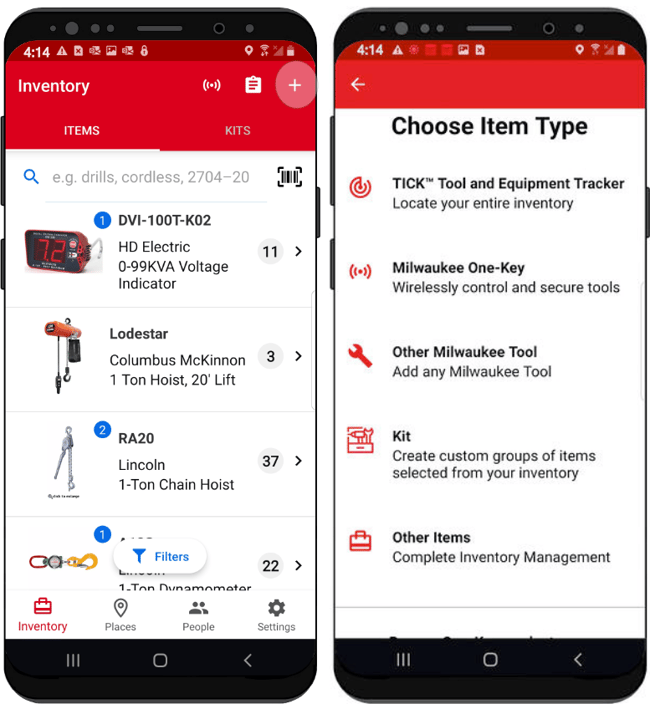
- Choose the type of item you’d like to add and categorize, such as “Other Milwaukee Tool” or “Other Items” (the latter being items from other manufacturers).
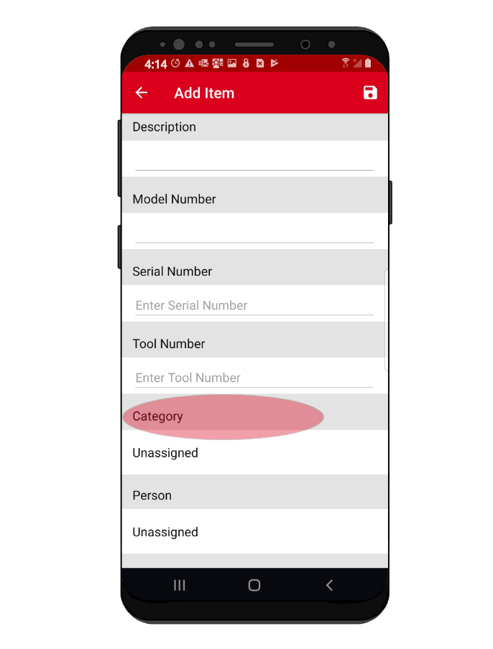
- You can search for your item by model # if it’s a Milwaukee tool, or add its manufacturer, model #, and description manually; below you new item’s description, you’ll also notice a “Category” among the information you can add for this item. Add this item to a category by tapping "Category,” then either selecting one of your current categories/subcategories, or adding a new one. Once you’ve added your new inventory item and its relevant details, make sure to tap the Save icon.
Your changes have been logged and you can now search for your brand new item by category and subcategory.
How to Add Categories and Subcategories on iOS
In this section, we'll show you how to:- Add categories.
- Add subcategories.
- Add existing items to a category and subcategory.
- Add new items to a category and subcategory.
Navigate to Categories
- At the top righthand corner of your app screen on your mobile device, you’ll see a clipboard shaped icon. Tap this button to get started.
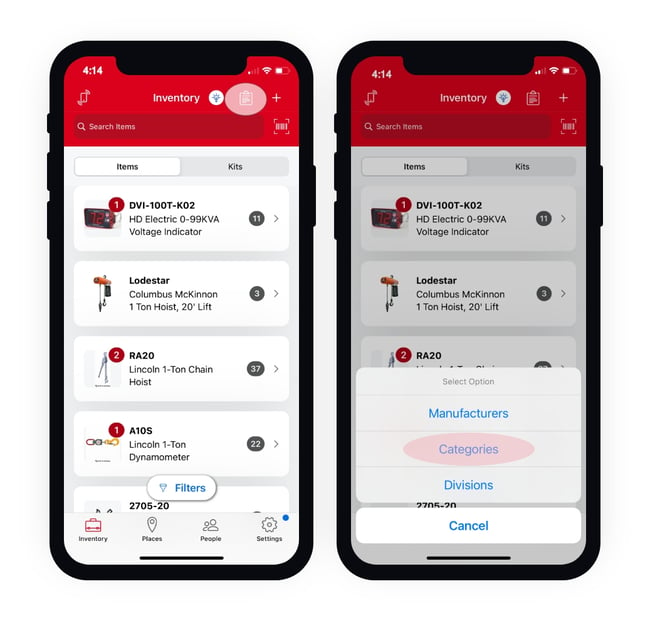
- This will open a dropdown menu of options you can select. Select “Categories.”
1. How to Add Categories
- You’ll be redirected to the Category screen. Once here, tap the + shaped add icon to add a new category.

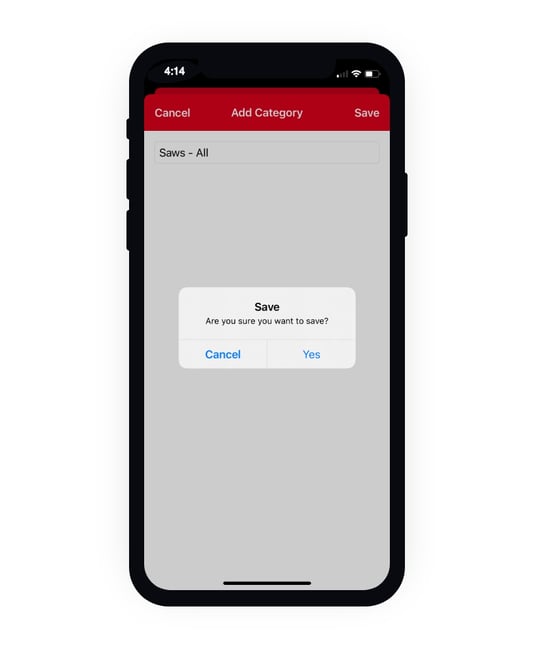
- Use the provided text box to add your category, then tap Save.
- You’ll be displayed a confirmation message, asking you if you’re sure you want to add your category. Tap “Yes” to log this new category in your inventory.
Your category has been saved and you will now be able add existing or new items to this new category for an added level of organization.
2. How to Add Subcategories
Now that you’ve added a new category, let’s show you how to add a subcategory to this category to this category for one layer further of organization.
- Navigate to your “Category” list from inventory by tapping into on the same clipboard shaped icon in the upper righthand corner of your screen.
- Scroll your list of categories to find the category you want to add a subcategory to.
- Once you’ve found the specific category you’d like to add a subcategory to, select the overflow icon beside this category. This will prompt a dropdown of a few options.
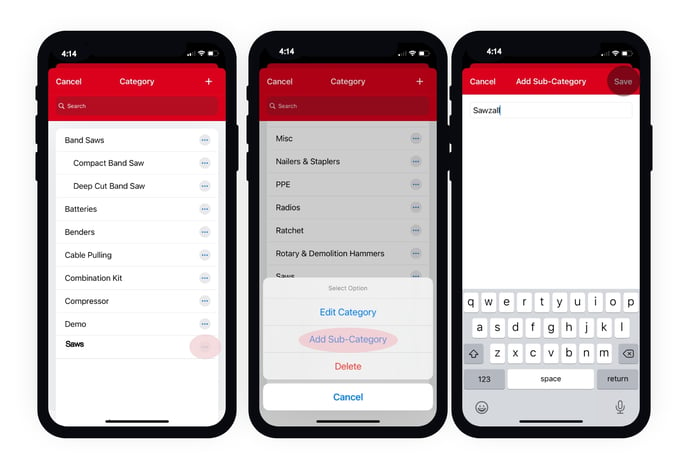
- Select “Add Sub-Category” to add your subcategory to this main category. A text box will similarly pop up, so use this to name your new subcategory, then tap Save. You’ll be displayed a message, asking you if you’re sure you want to add this subcategory to your inventory. Tap Yes.
Your subcategory has now been saved and you will now be able to add existing or new items to both this subcategory and its main category, for added classification.
How to Organize Existing and New Items by Category and Subcategory
Now that you know how to add categories and subcategories, you can now organize both existing and new inventory by the category and subcategory that best describes them.
Let’s show you how.
3. How to Categorize and Subcategorize Existing Items
- To categorize or subcategorize one of your existing items, navigate back to Inventory.
- Scroll your inventory and find the item you’d like to categorize and subcategorize.
- Click into your item’s details.
- Once on your item’s details screen, tap the grayish carrot icon beside its name and description.
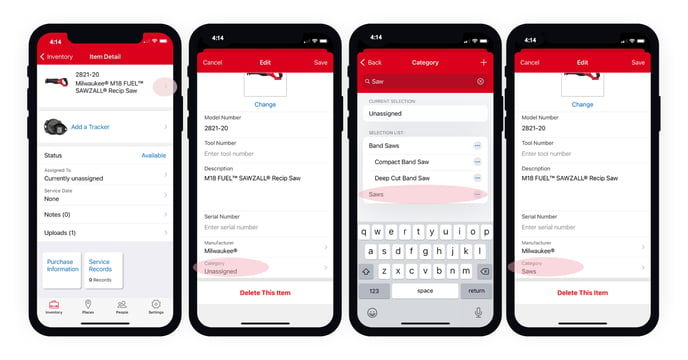
- Once on the Edit screen, select the Category option near the middle of your screen.
- Once on the Category screen, scroll your categories and assign your existing item to a category or subcategory simply by tapping the category, then tap the back button to go back to your item’s details, where you’ll see the category and subcategory updated.
Your changes have been logged and you can now search for this item by category and subcategory.
4. How to Categorize and Subcategorize New Items
- To categorize and subcategorize one of your new items, you can do so in the process of adding it to inventory, whether it’s Milwaukee® tool, or a tool or piece of equipment from another manufacturer.
- To do this, navigate back to Inventory.
- Once here, tap the + add icon at the top righthand corner of your screen.
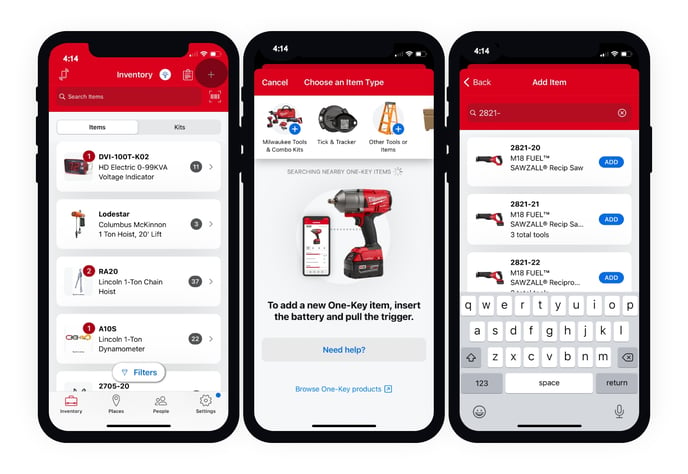
- Choose the type of item you’d like to add and categorize, such as “Other Milwaukee Tool” or “Other Items” (the latter being items from other manufacturers).
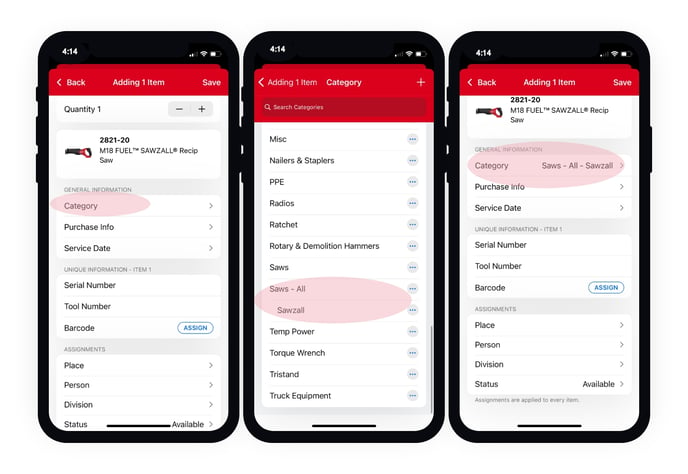
- You can search for your item by model # if it’s a Milwaukee tool, or add its manufacturer, model #, and description manually; below you new item’s description, you’ll also notice a “Category” among the information you can add for this item. Add this item to a category by tapping "Category,” then either selecting one of your current categories/subcategories, or adding a new one. Once you’ve added your new inventory item and its relevant details, make sure to tap the Save icon.
Your changes have been logged and you can now search for your brand new item by category and subcategory.
How to Add Categories and Subcategories on Web
In this section, we'll show you how to:
- Add categories.
- Add subcategories.
- Add existing items to a category and subcategory.
- Add new items to a category and subcategory.
Navigate to Categories
- Along the left-hand side of your screen, hover over the inventory icon and it will expand, showing numerous options you can add.
- Select “Categories,” near the bottom of the dropdown list.
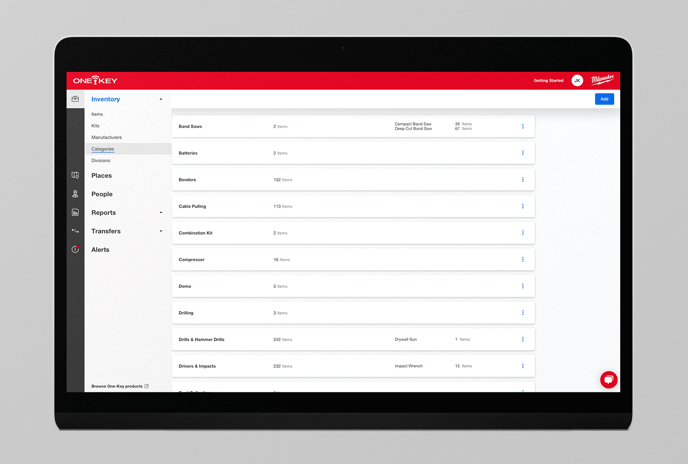
1. How to Add Categories
- Once on the Categories screen, select the blue Add button in the top righthand corner of your screen.
- An “Add category” screen will pop up. In the provided text box labeled Category, type in any category you’d like to add, then select Save.
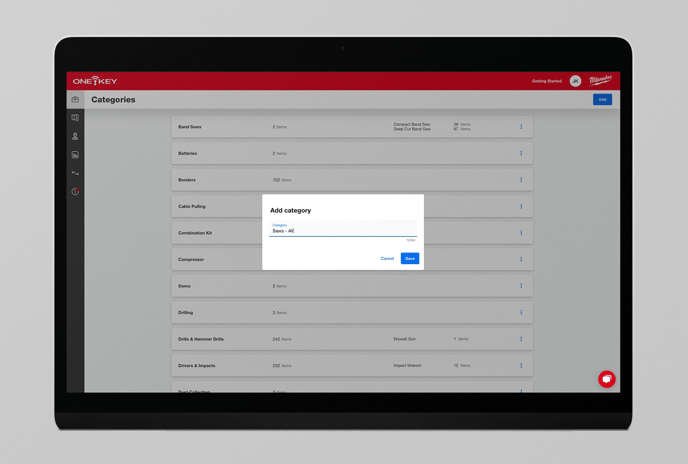
Your category has been saved and you will now be able add existing or new items to this new category for an added level of organization.
2. How to Add Subcategories
Now that you’ve added a new category, let’s show you how to add a subcategory to this category to this category for one layer further of organization.
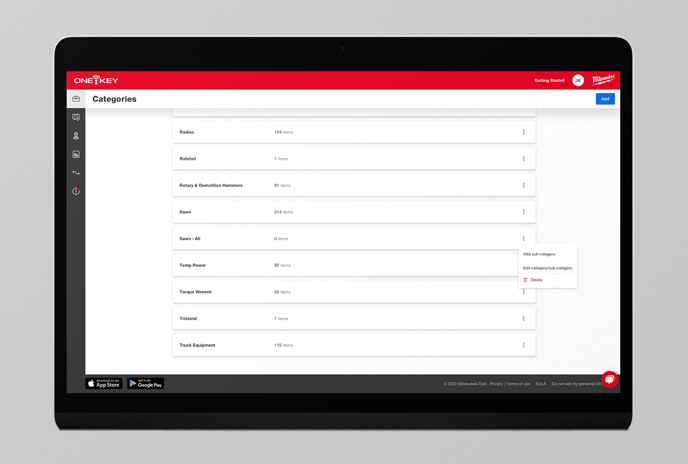
- Navigate to the Categories screen as above.
- Find your new category and click on the blue overflow button to the right of it, and select “Add sub category.”
- Type in any subcategory you’d like for this category in the provided text box and click Save.
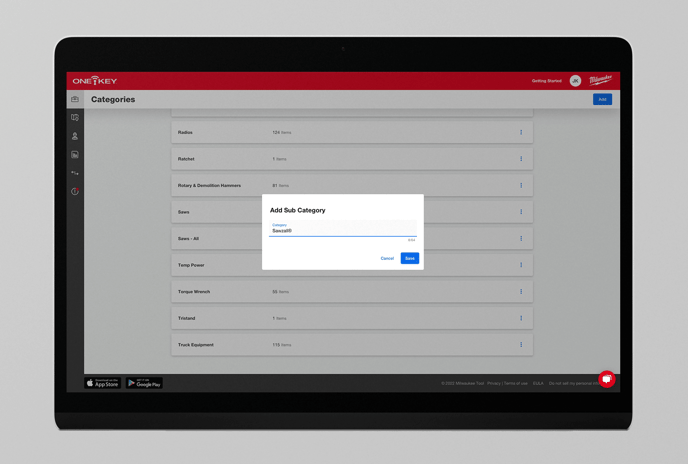 Your subcategory has now been saved and you will now be able to add existing or new items to both this subcategory and its main category, for added classification.
How to Organize Existing and New Items by Category and Subcategory
Now that you know how to add categories and subcategories, you can now organize both existing and new inventory by the category and subcategory that best describes them.
Let’s show you how.
3. How to Categorize and Subcategorize Existing Items
- To categorize or subcategorize one of your existing items, navigate back to Inventory by selecting “Items” among you inventory dropdown.
- Scroll your inventory and find the item you’d like to categorize and subcategorize.
- Click into your item’s details.
- Select the blue overflow icon at the top righthand corner of your item’s details card and click Edit.
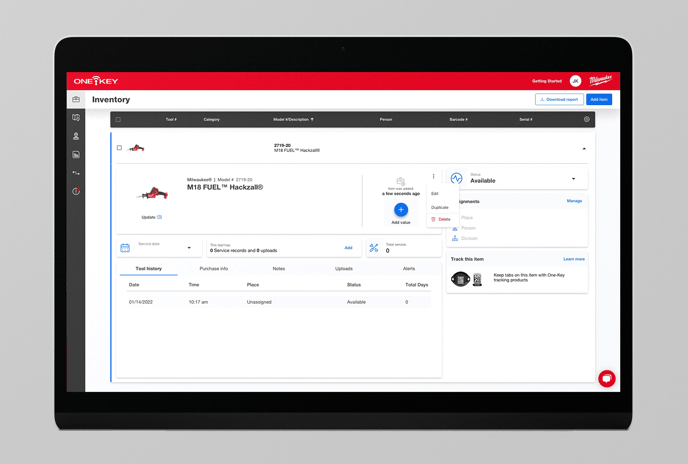
- Within the Edit screen, you’ll see an option to add a Category.
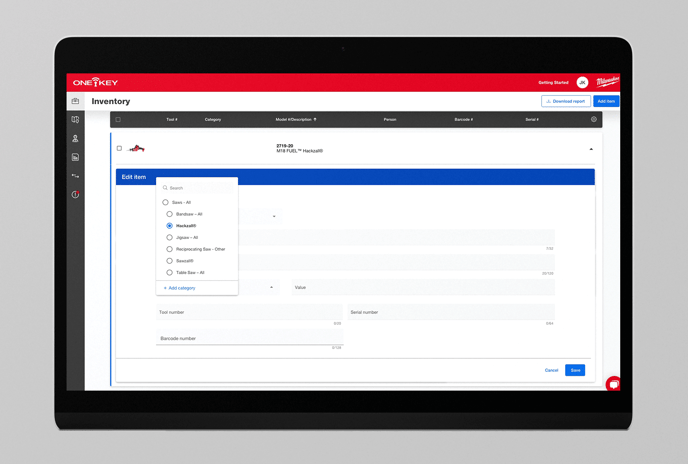
- Click the Category dropdown. You’ll see your new categories drop down, as well as the subcategory associated with each one dropdown below it. Add this item to a category by clicking the circle beside the desired category, and assign it to a subcategory by clicking the circle beside the subcategory you’d like to add it to.
- Once you’ve selected your category and subcategory assignments, click Save.
Your changes have been logged and you can now search for this item by category and subcategory.
4. How to Categorize and Subcategorize New Items
- To categorize and subcategorize one of your new items, you can do so in the process of adding it to inventory, whether it’s Milwaukee® tool, or a tool or piece of equipment from another manufacturer.
- To do this, navigate back to Inventory by selecting “Items” among you inventory dropdown.
- Select the blue “Add item” button in the top righthand corner of your screen, then the “Get started” button beside the “Start from scratch” selection option.
- You can search for your item by model # if it’s a Milwaukee tool, or add its manufacturer, model #, and description manually; below you new item’s description, you’ll also notice a “Category” dropdown menu. Add this item to a category by clicking the circle beside the desired category, and assign it to a subcategory by clicking the circle beside the subcategory you’d like to add it to.
- Once you’ve selected your category and subcategory assignments, and any other relevant information for your new item, click Save.
Your changes have been logged and you can now search for your brand new item by category and subcategory.
Categories and subcategories for your tools and equipment add a layer of organization and customization to your inventory.