With geofence technology, you can set up virtual perimeters around any of your locations in One-Key to build visibility to your tools, and ensure if they're spotted outside the boundaries you've set up for where they're assigned, you'll get notified.
In this article, we'll show you how to set up a geofence for one of your places using your the ONE-KEY™ mobile and web-based apps.
You can select any of the below bulleted items to be taken to the corresponding section of this article where we discuss each of them:
- Learn how to add a geofence on Android
- Learn how to add a geofence on iOS
- Learn how to add a geofence on Web
Get started on One-Key for Android, iOS, or Web
-
Log in to your One-Key account from your desktop computer.
-
The homepage, or Inventory Dashboard, will display on your screen.
How to add a geofence on Android
Note: The screens featured in this article may appear different than what you see on your device due to different phone manufacturers having different procedures.
With Geofencing, you can take security measures to protect and keep tabs on your tools. You can set up a geofence when you add a place.
In this section, we'll show you how to add a geofence to an already created place.
-
Starting from the Inventory Dashboard, which will load by default, tap on Places at the bottom of the screen.
-
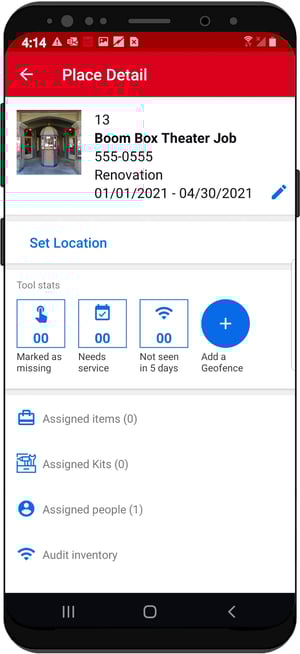
From your list of places, tap on the place that you wish to add a geofence to.
-
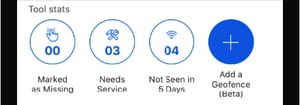
Now tap the blue “Add a Geofence” button in the middle of your screen, just below your place's contact info. A map will enlarge to fill the screen.
4. Set your location by entering the address in the search bar at the top of your screen, or by pressing and holding a point on the map to drop a pin.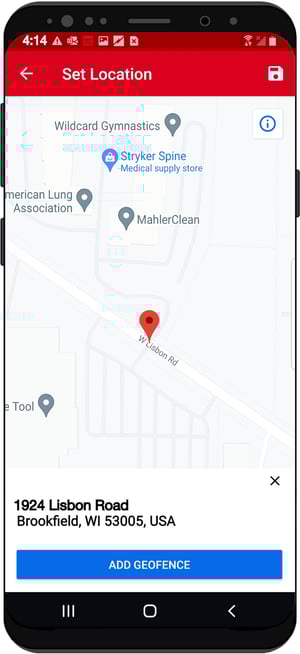
5. Now tap the blue “Add Geofence” button. A rectangular box will appear over your place. Tap and drag the perimeter buttons to adjust the shape and size of your geofence.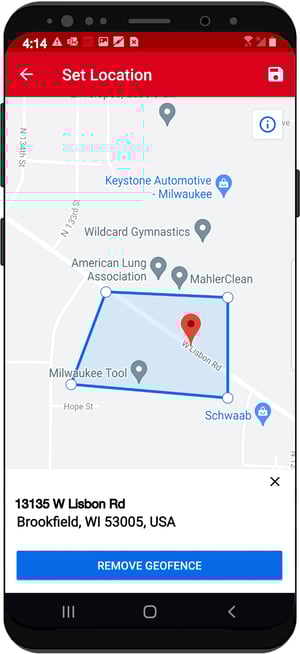
6. Make sure you tap the blue “Save” button in the upper right-hand corner of the screen when you’re finished adding the geofence. Now you will receive an alert whenever any tools or equipment assigned to this place moves past the geofence.
How to add a geofence on iOS
With Geofencing, you can take security measures to protect and keep tabs on your tools. You can set up a geofence when you add a place.
In this section, we'll show you how to add a geofence to an already created place.
-
Starting from the Inventory Dashboard, tap on Places at the bottom of the screen.
-
From your list of places, tap on the place that you wish to add a geofence to.
-
Now tap the blue “Add a Geofence” button midway down on the right-hand side of your screen. A map will enlarge to fill the screen.
4. Set your location by entering the address in the search bar at the bottom of the screen, or by pressing and holding a point on the map to drop a pin.
5. Now tap the blue “Add Geofence” button. A rectangular box will appear over your place. Tap and drag the perimeter buttons to adjust the shape and size of your geofence.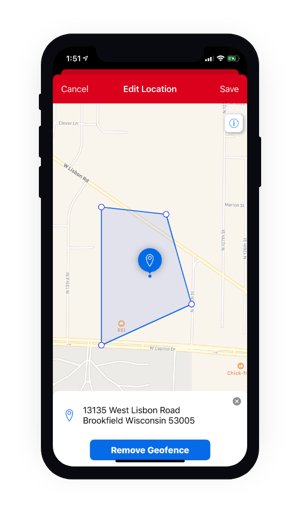
6. Make sure you tap the blue “Save” button in the upper right-hand corner of the screen when you’re finished adding the geofence.
Now you will receive an alert whenever any tools or equipment assigned to this place moves past the geofence.
How to add a geofence on Web
A geofence is an innovative security measure that you can deploy to protect and track your tools with One-Key. You can set up a geofence anytime you add a place, but what if you didn’t set one up at the time of your place’s creation? This section will show you how to go back and add a geofence to an already created place.
-
Start at the Inventory Dashboard and hover your cursor over the map icon on the left side of the screen. The navigation bar will expand, revealing a list of options. Click “Places.”
-
From your list of places, click on the place that you wish to add a geofence to.
-
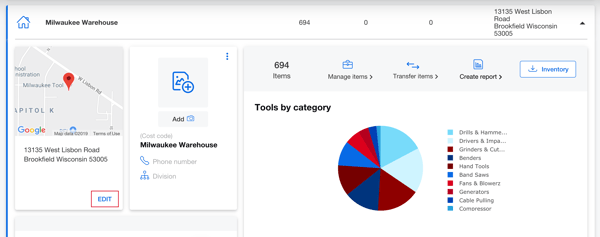
On the left side of the screen, you should see a small map of your selected place. Beneath the address, click “EDIT.”
-
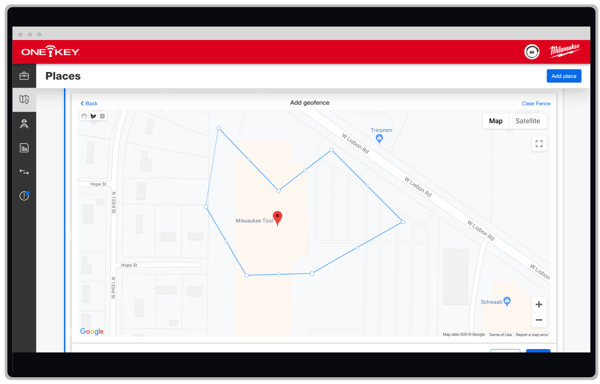
The map will enlarge to fill the screen. Now click the blue “Add geofence” button displayed beneath the address on the left side of the screen.
-
In the upper right-hand corner of the map, you will see two drawing tools. Choose either the polygon or square drawing tools and draw the geofence around your place. Clicking and dragging the perimeter buttons allows you to further adjust the shape of your geofence.
-
Make sure you click the blue “Save” button in the bottom right-hand corner of the map when you’re finished adding the geofence.
Now you will receive an alert in One-Key any time a tool assigned to your selected place strays beyond the virtual boundary of your newly drawn geofence.
Adding a geofence is just one more way One-Key empowers you to know exactly where your tools are.