Logging Modes in the Library
Pick and choose which modes are loaded on your tool on a given day by utilizing your mode library.
By default, most Milwaukee® smart tools feature 3 to 4 programmable modes that can be customized for the work you do.
But what happens when 3 or 4 modes are not sufficient for all the different tasks that may need to get done? In this article, we’ll show you how to take advantage of your tool’s mode library, allowing you to log unlimited modes to the cloud and pick and choose which modes are programmed on your tool when they’re needed.
You'll learn how to take advantage of the mode library feature via your Android or iOS smartphone.
You can select any of the below bulleted items to be taken to the corresponding section of this article where we discuss each of them:
Get Started on the One-Key Mobile App
- Launch the One-Key app on your mobile device
- Your inventory will load by default.
How to log modes in the library on Android
Note: The screens featured in this article may appear different than what you see on your device due to different phone manufacturers having different procedures.
In this section, we'll show you how to:
Let's get started.- You'll then need to connect to your tool via Bluetooth. To do this, tap the “nearby devices” icon in the top right-hand corner of your mobile device’s screen.
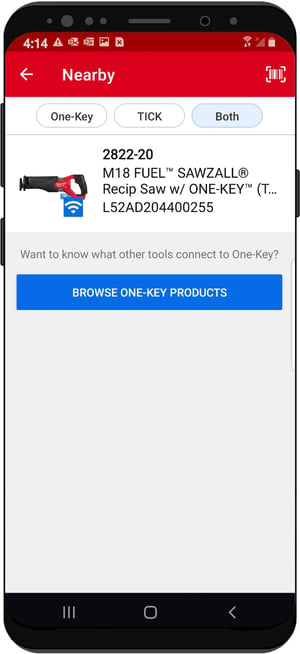
- Your nearby devices will start to populate your screen. Choose the tool you wish to connect to.
1. Saving Modes to Mode Library
- Once connected, you’ll see 3 or 4 modes (depending on the tool) that you can customize. For instance, the SAWZALL® we're using in the example below has 3 modes on it that can be customized.
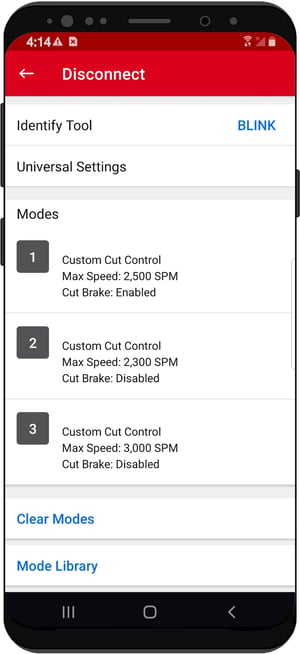
- If all of your modes have already been customized and you need to add additional modes, you can back up your modes to the mode library. To do this, tap into the mode you want to back up.
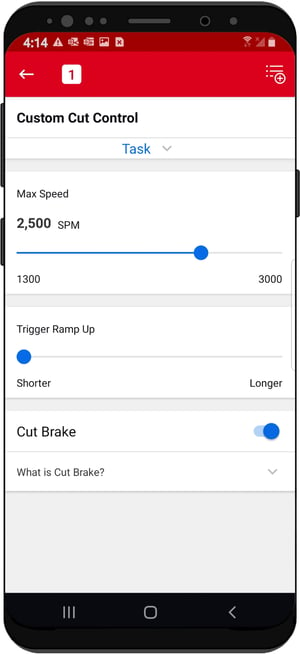
- Once here, make any adjustments, then tap the “Add to Library” icon in the top righthand corner of your mobile device’s screen.
- A prompt will appear asking you to name and save your newly created mode.
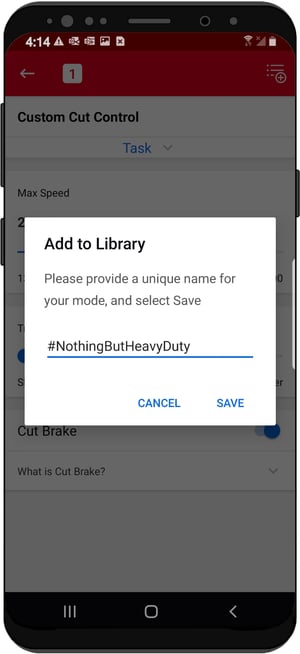
Make sure to give your mode a unique name that corresponds with the settings you’ve customized and describes the work you’ll be using this mode for, then tap Save.
2. Accessing Your Tool’s Saved Modes in the Mode Library
- To access your tool’s mode library, you’ll go back to the tool’s main screen.
- Scroll to the bottom of the screen. Under “Modes,” you’ll see a “Mode Library” button. Tap this button to enter the mode library.
- Once here, you’ll see your new mode, as well as a list of all the modes you’ve previously backed up to your tool’s mode library.
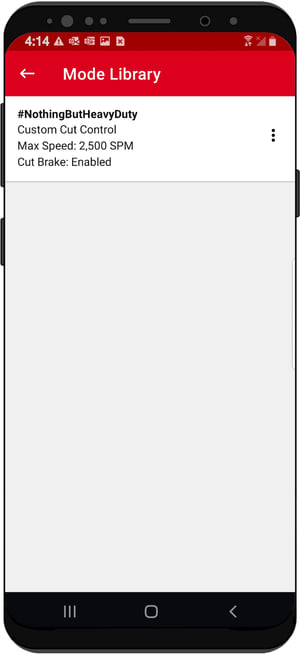
- Tap into any mode in your mode library, and you’ll now be able to pick which modes from your mode library you’d like to apply to your tool.
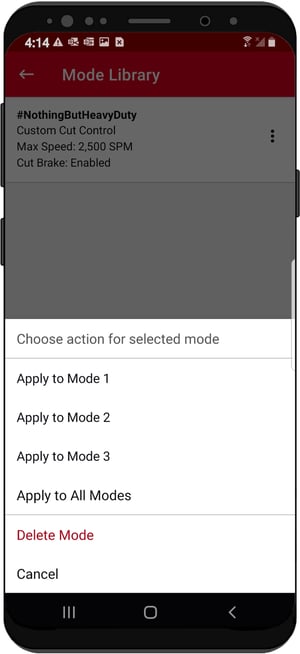
Pick any of the modes on your tool to apply the mode from your tool’s mode library to. By doing this, you’ll be able to filter through pre-saved modes on any given day's work and ensure your tool is ready for the job.
How to log modes in the library on iOS
In this section, we'll show you how to:
Let's get started.
- You'll then need to connect to your tool via Bluetooth. To do this, tap the “nearby devices” icon in the top left-hand corner of your mobile device’s screen.
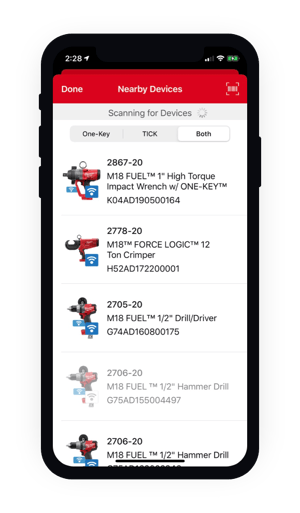
- Your nearby devices will start to populate your screen. Choose the tool you wish to connect to.
1. Saving Modes to Mode Library
- Once connected, you’ll see 3 or 4 modes (depending on the tool) that you can customize.
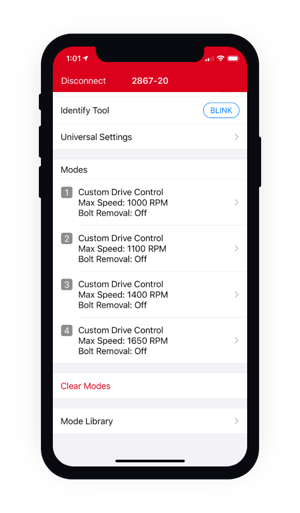
- If all of your modes have already been customized and you need to add additional modes, you can back up your modes to the mode library. Tap into the mode you want to back up.
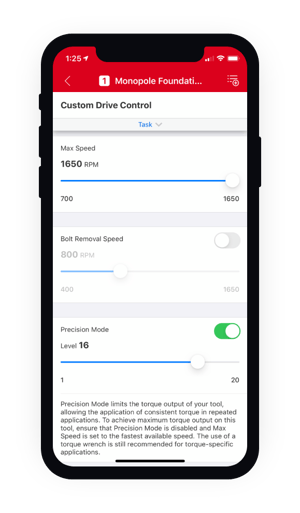
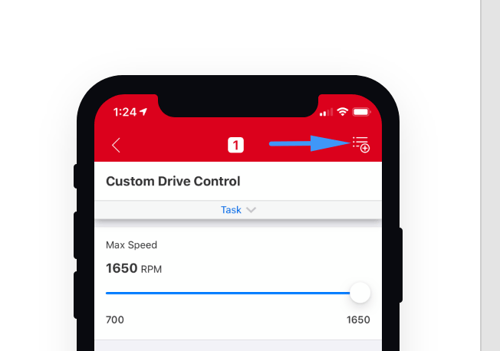
- Once here, make any adjustments, then tap the “Add to Library” icon in the top righthand corner of your mobile device’s screen.
- A prompt will appear asking you to name and save your newly created mode.
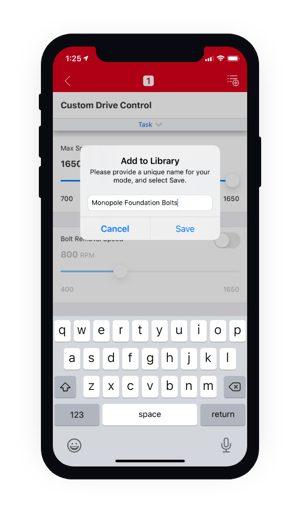
Make sure to give your mode a unique name that corresponds with the settings you’ve customized and describes the work you’ll be using this mode for, then tap Save.
2. Accessing Your Tool’s Saved Modes in the Mode Library
- To access your tool’s mode library, you’ll go back to the tool’s main screen.
- Scroll to the bottom of the screen. Under “Modes,” you’ll see a “Mode Library” button. Tap this button to enter the mode library.
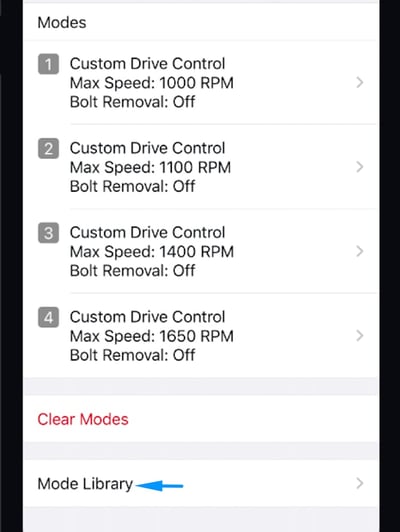
- Once here, you’ll see your new mode, as well as a list of all the modes you’ve previously backed up to your tool’s mode library.
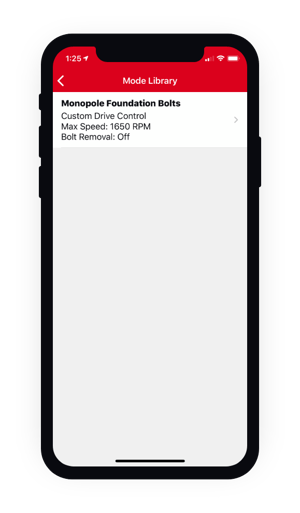
- Tap into any mode in your mode library, and you’ll now be able to pick which modes from your mode library you’d like to apply to your tool.
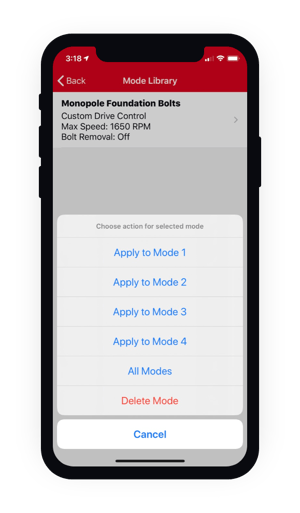
Pick any of the modes on your tool to apply the mode from your tool’s mode library to. By doing this, you’ll be able to filter through pre-saved modes on any given day's work and ensure your tool is ready for the job.
Milwaukee smart tools come with either 3 or 4 customizable modes built into them. However, with the mode library, you can log away as many custom modes as you might need and apply them to the modes on your tool for the work that’s needed depending on the day.