Tooling up a job and keeping track of everything can be a challenging undertaking, especially those easy to misplace smaller items. You might already be clumping a lot of miscellaneous tools and equipment into a job box—all needed to accomplish a day’s work but easily misplaced in the chaos of an active building site. The tool kitting feature in One-Key now lets you group these like items that you’re sending to the job. That way, everything is in one place, easily findable, and accounted for in the app.
In this article, we'll show you how to use the Tool Kitting feature via the One-Key mobile and web-based apps.
You can select any of the below bulleted items to be taken to the corresponding section of this article where we discuss each of them:
- Learn how to create a tool kit on Android
- Learn how to create a tool kit on iOS
- Learn how to create a tool kit on Web
Get Started on Android, iOS, or Web
- Launch the app on your mobile device or in your web browser.
- Your inventory will load by default.
How to Create a Tool Kit on Android
Note: The screens featured in this article may appear different than what you see on your device due to different phone manufacturers having different procedures.
In this section, we'll show you:
1. Navigate to "Kits" in Inventory
- You’ll now see an option to display either “ITEMS” or “KITS.” Tap “KITS” to get started.

2. Create and Manage Your Kit
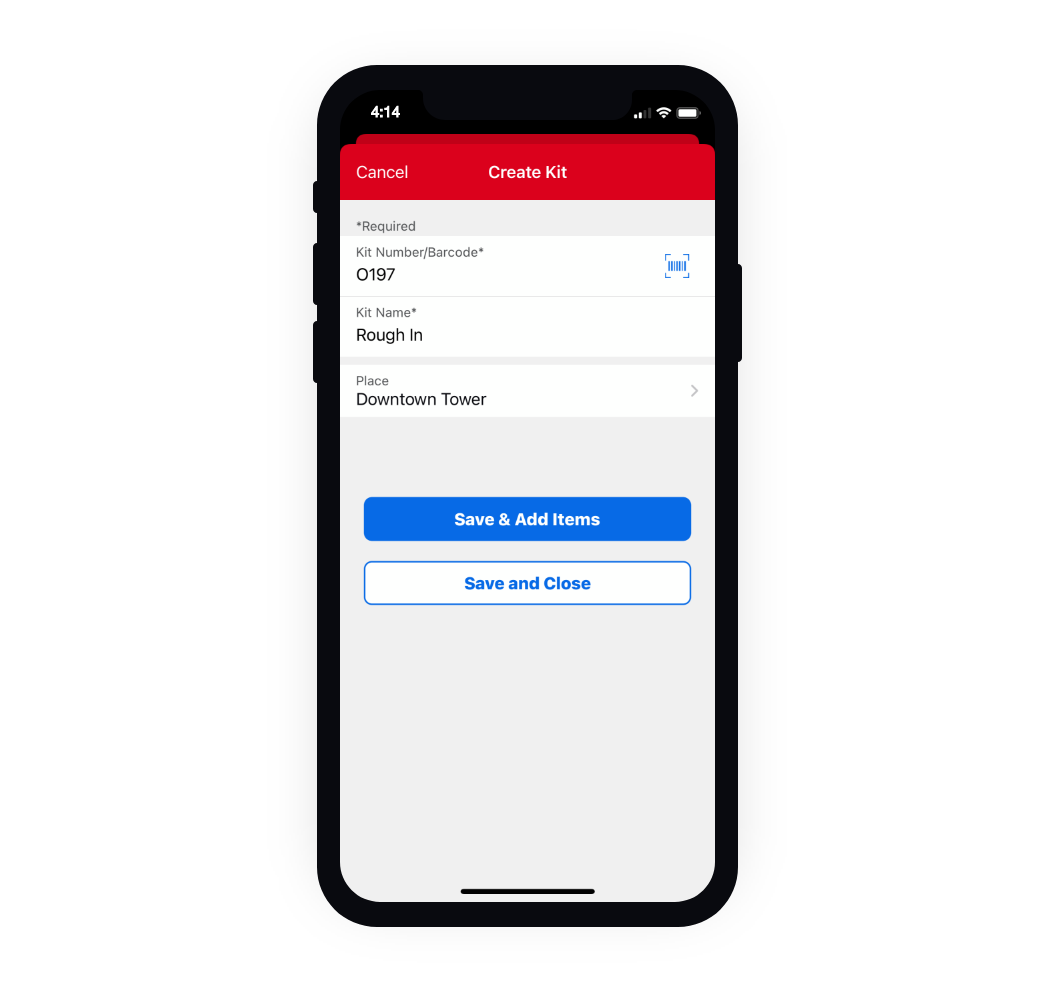
- To create your new kit, first number your kit. This step is required and can help for easier finding in One-Key later.
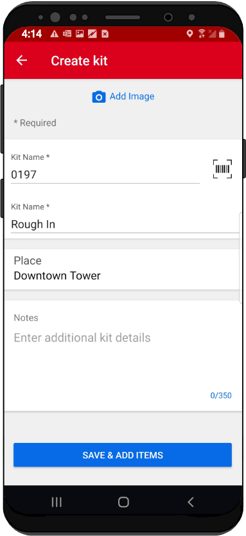
- You have the option to enter this number in manually or scan a barcode or One-Key asset ID tag if you have one that you’d like to add to this kit.
-
Next, give your kit a name (also required) and choose the project or job you’re sending it to. Then, tap “SAVE & ADD ITEMS” to start preparing this kit for the job.
-
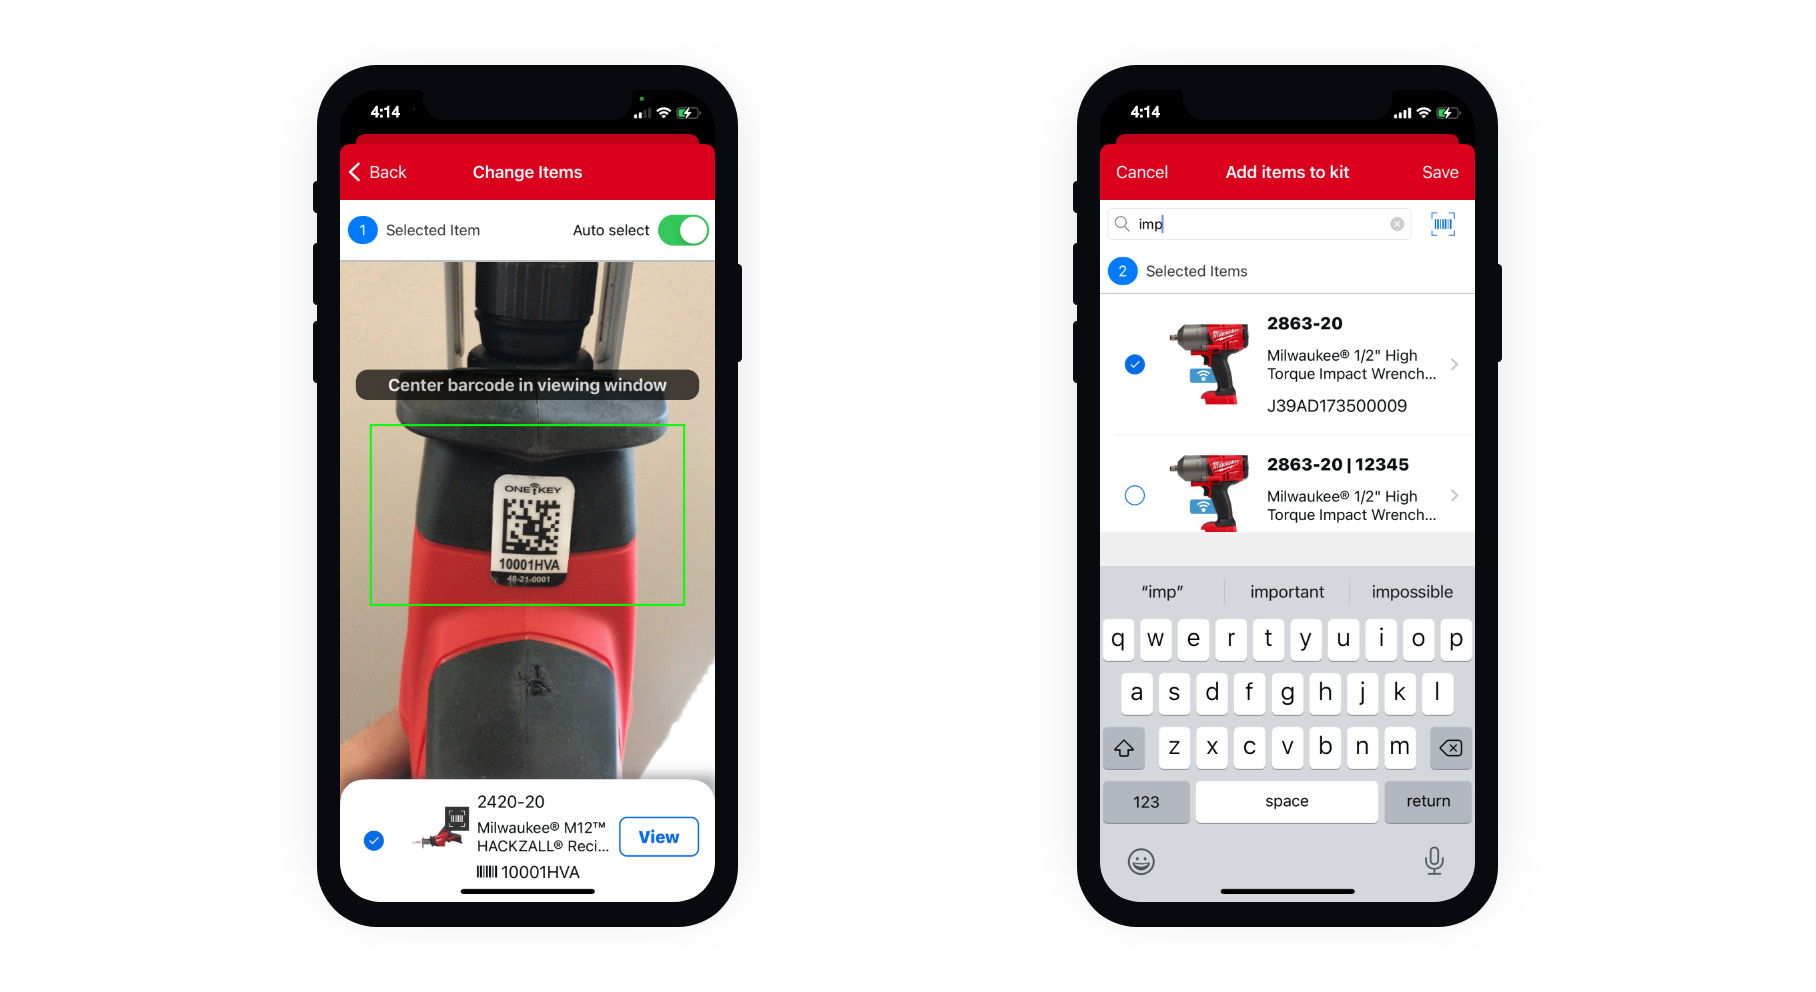
You can add items to your kit by scanning their barcode or tag if you’re using them, or you can type the name or model number into the search bar.
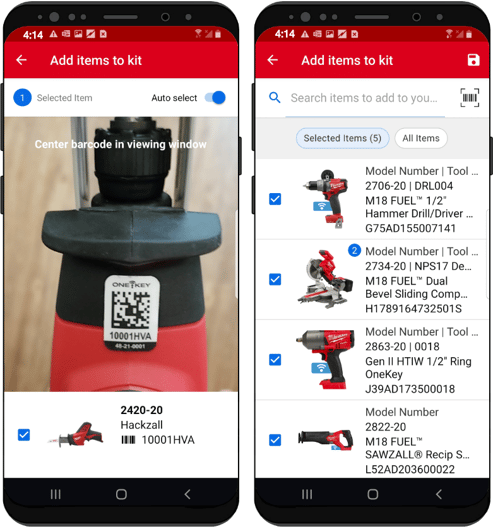
- Continue this process until you’ve added all the items you want to add to this kit.
-
When you’re satisfied, tap the Save icon in the upper righthand corner of your screen.
-
Your kit now will display when you launch your inventory and select the “KITS” menu.
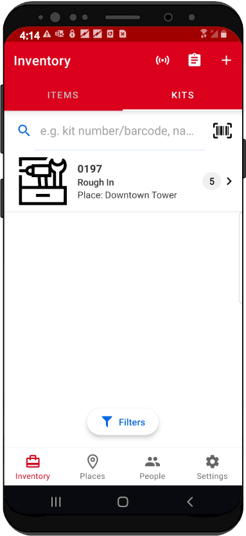
- Tap into your kit to manage it.
-
You can inspect each of your kits to see what’s on hand.
-
If you need rename, edit, or delete this kit, tap on the blue pencil icon at the top of your screen, beside the kit.
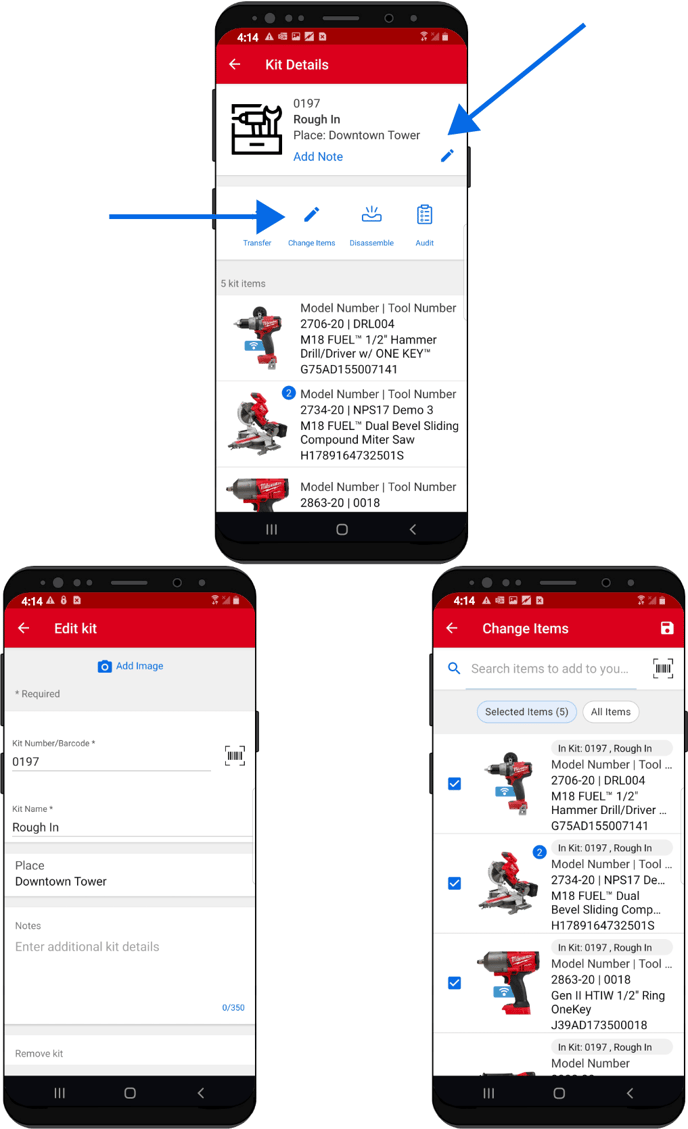
- Here, you'll be able to change your kit’s assigned number or barcode, change its name, or delete it if necessary.
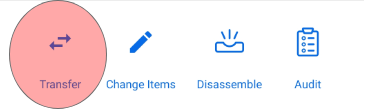
- You can change what's in your kit by tapping into “Change items” to add or subtract items to this kit from your inventory.
-
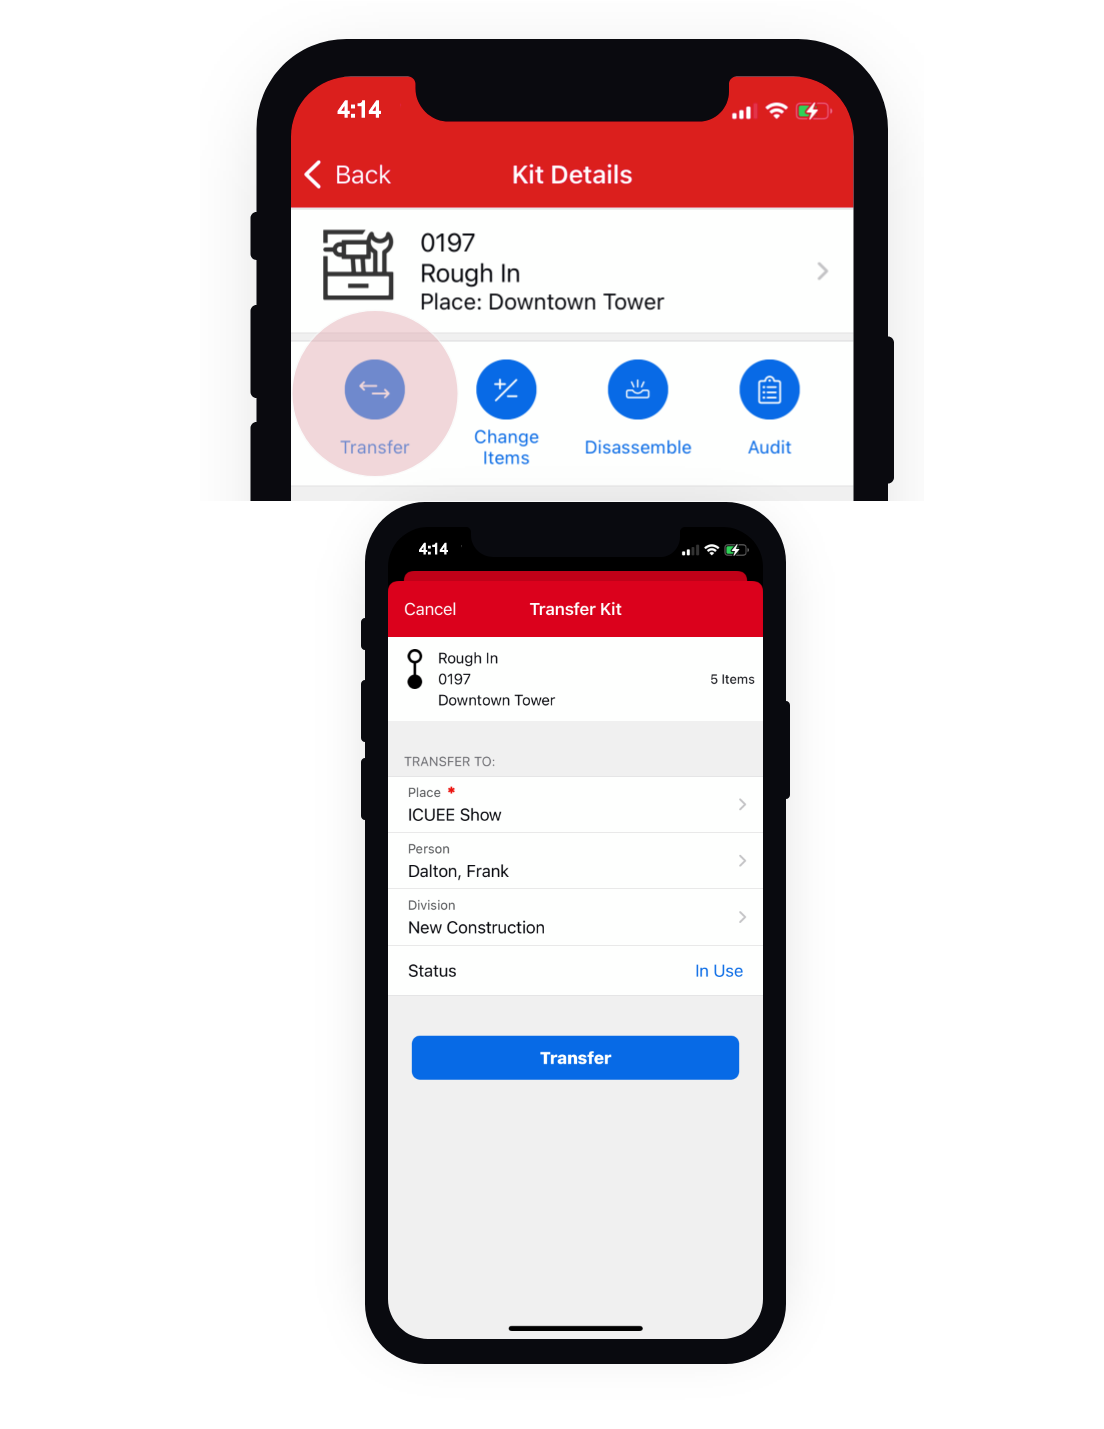
You can transfer this kit to another job where it might be needed. To do this, tap the “Transfer" button.
- Just select where it’s going. Assign a person, to add accountability. Assign a division to describe the type of work this kit is intended for. Change the status of this kit to reflect that it’s ready for the job or already being used. When you’re done, tap TRANSFER.
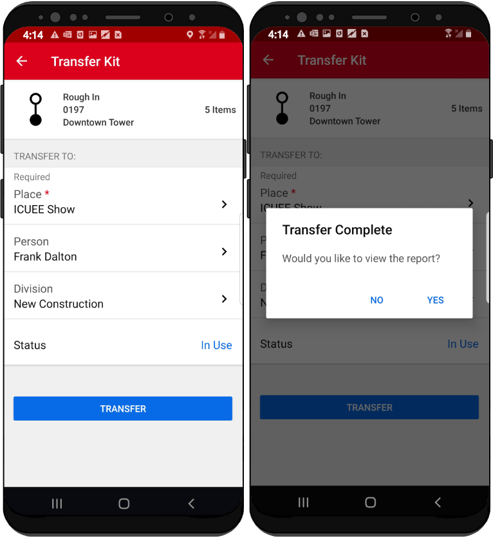
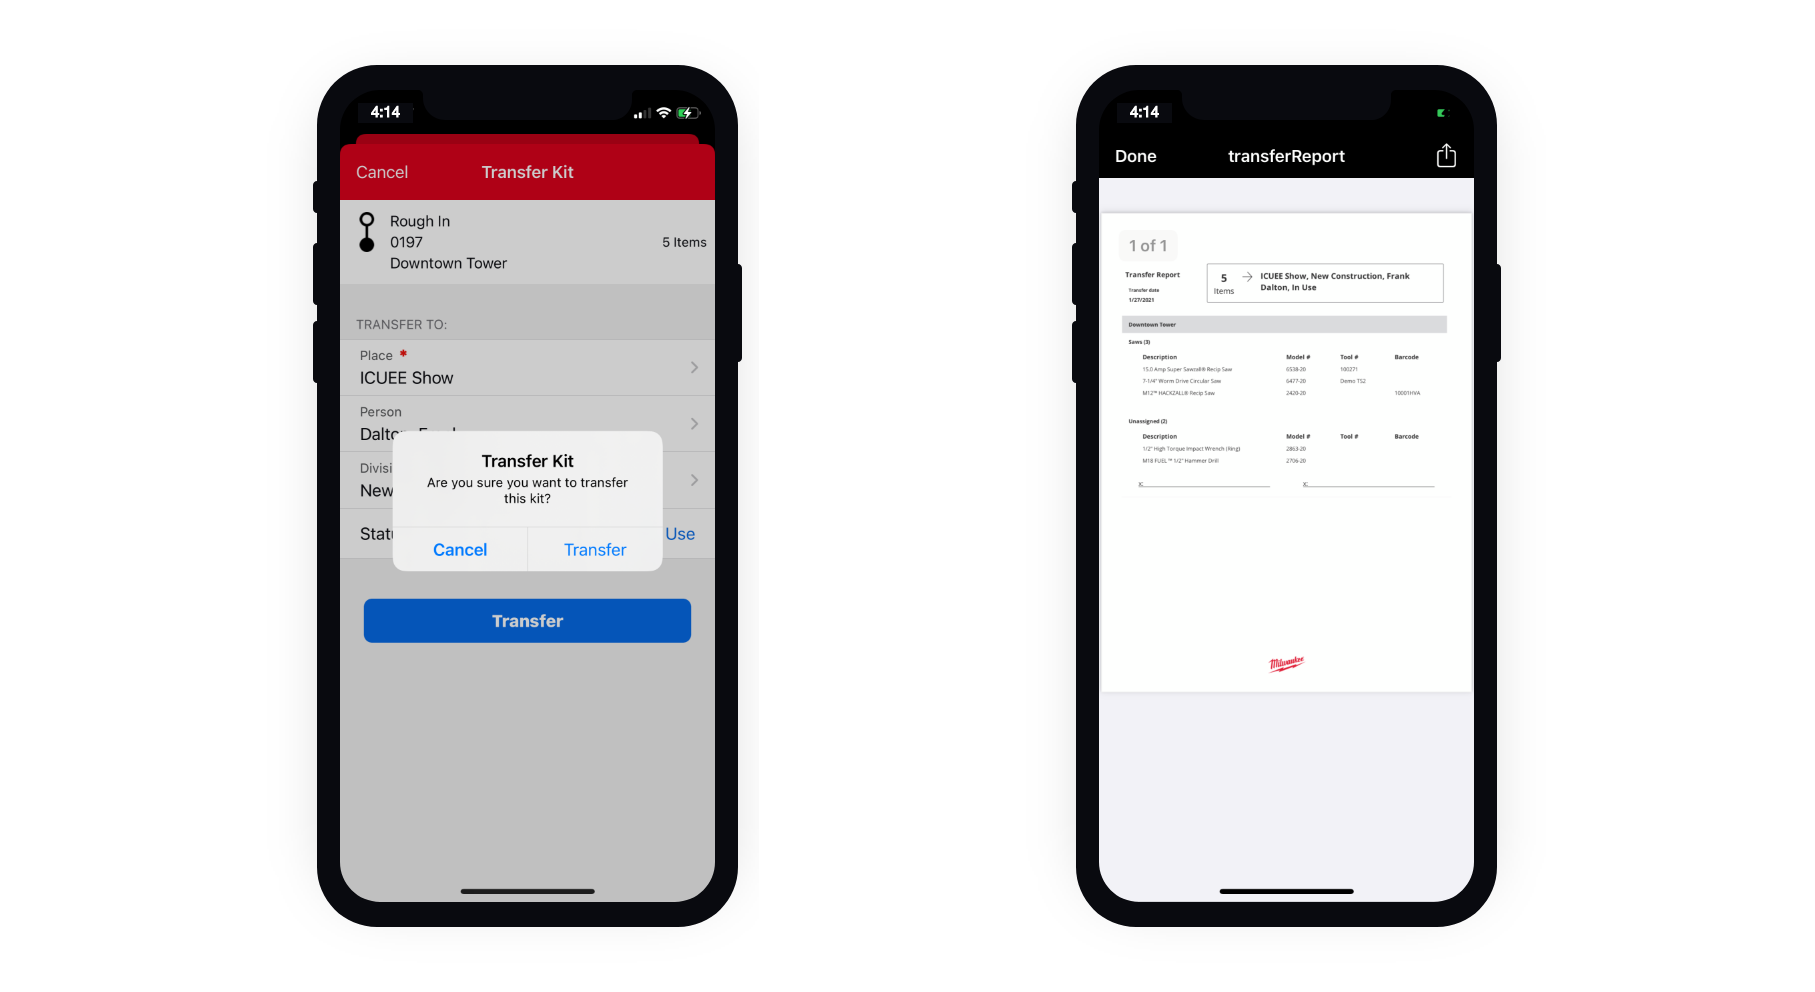
-
You'll be prompted to download a copy of this transfer. To do so, tap "YES." This transfer report can be printed off, or attached it to an email, to verify your tools have been sent.
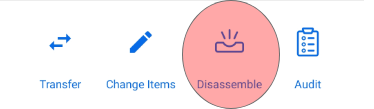
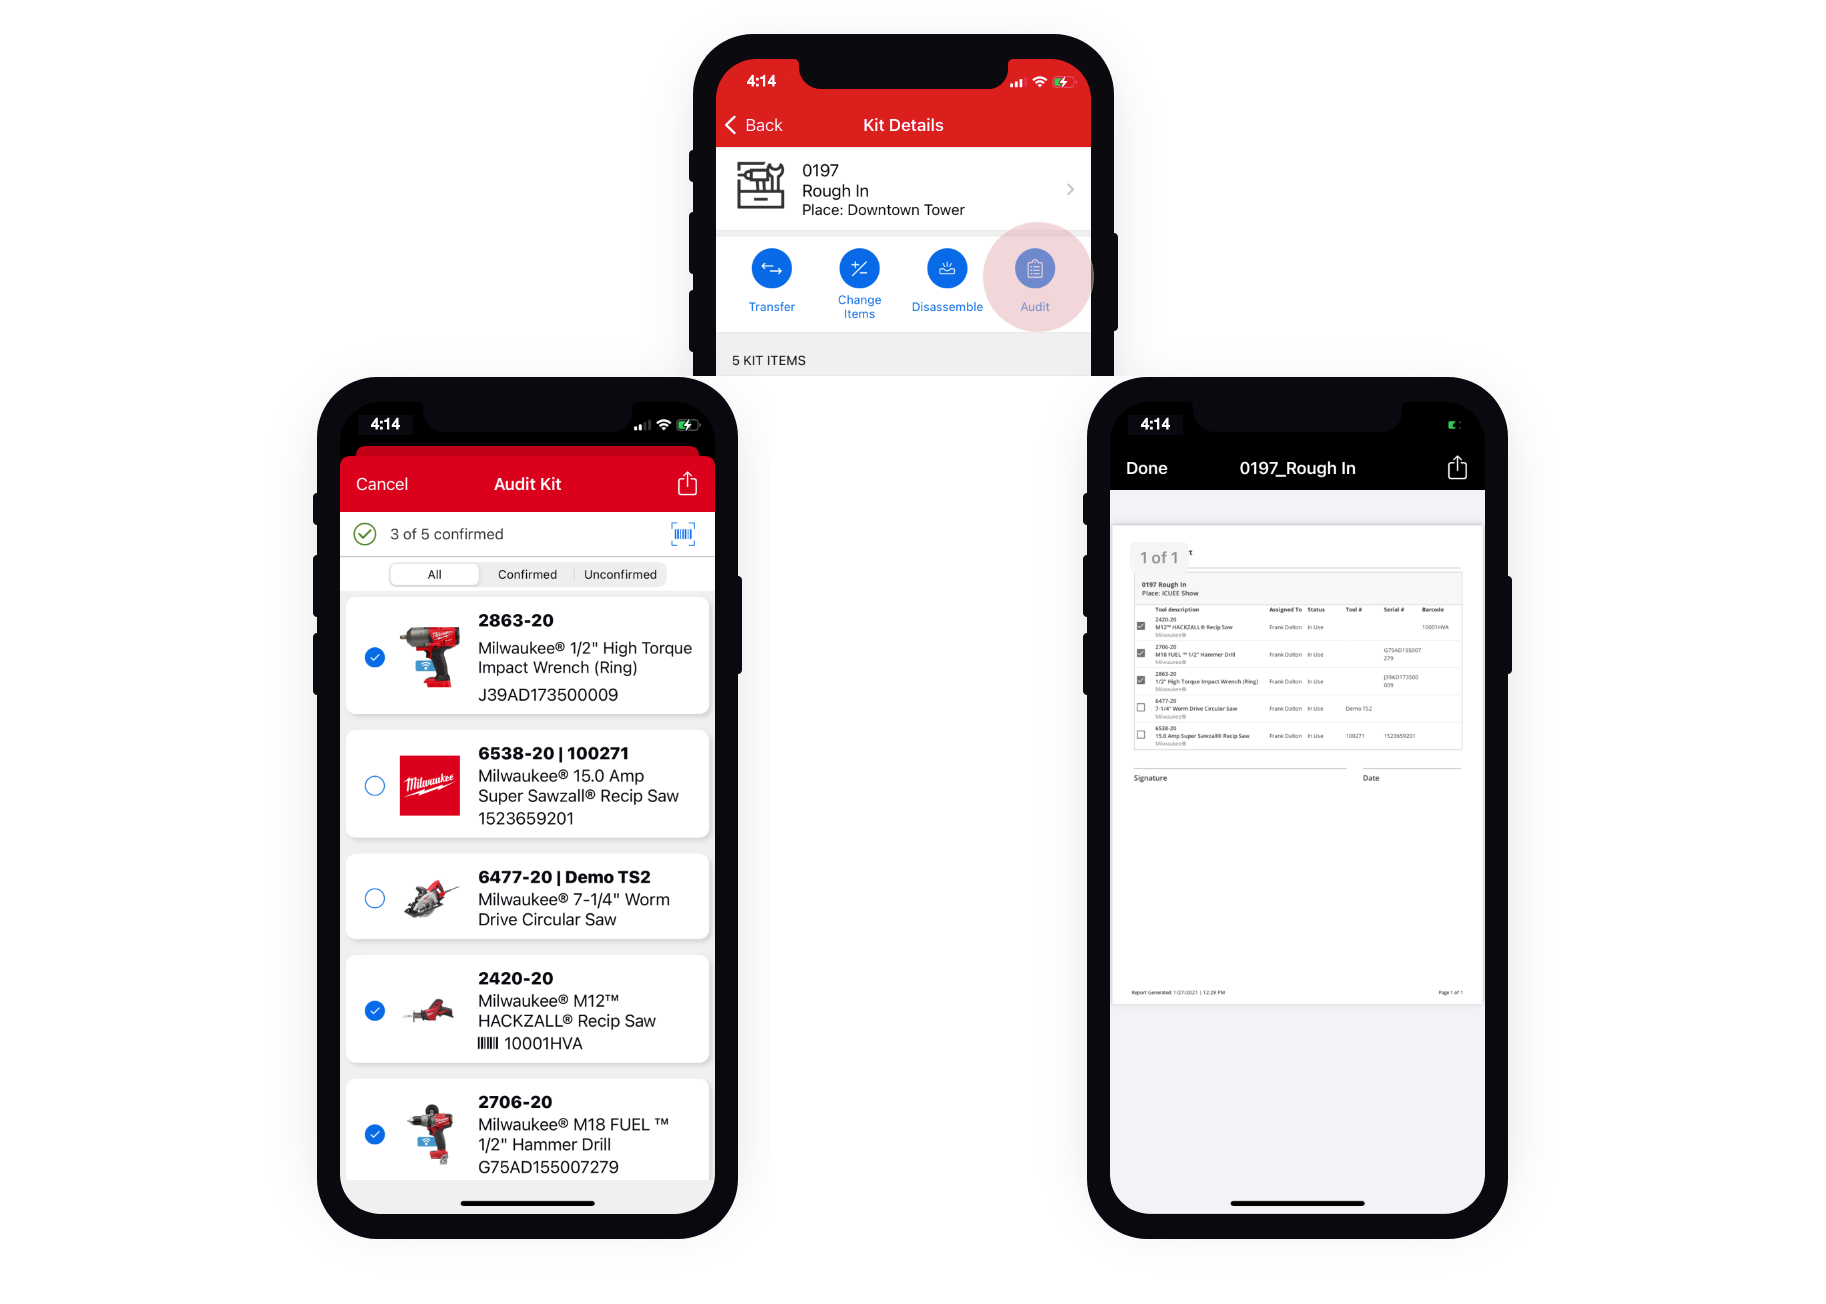
- You can also make use of the tool kit audit feature. Tap 'Audit.'
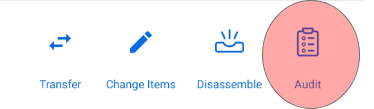
- This feature allows you to support accountability in your company by checking in your kit and its contents in real time as it arrives on the job, or at the end of the day or the end of a project to ensure what you started with is what you've ended with.
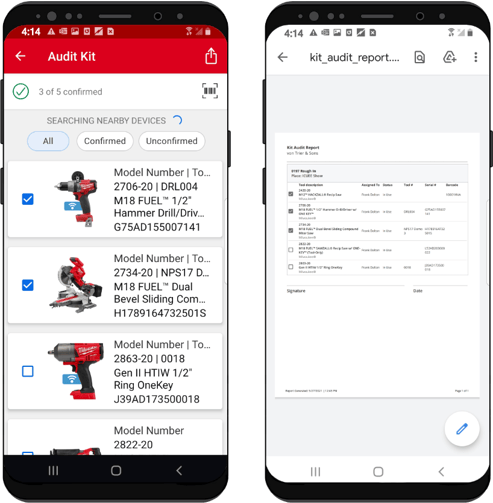
- Confirm what you have on hand by selecting each item individually. If something that's supposed to be in the kit isn't there, leave it unchecked. You can then send this audit back to the tool team to iron out any discrepancies.
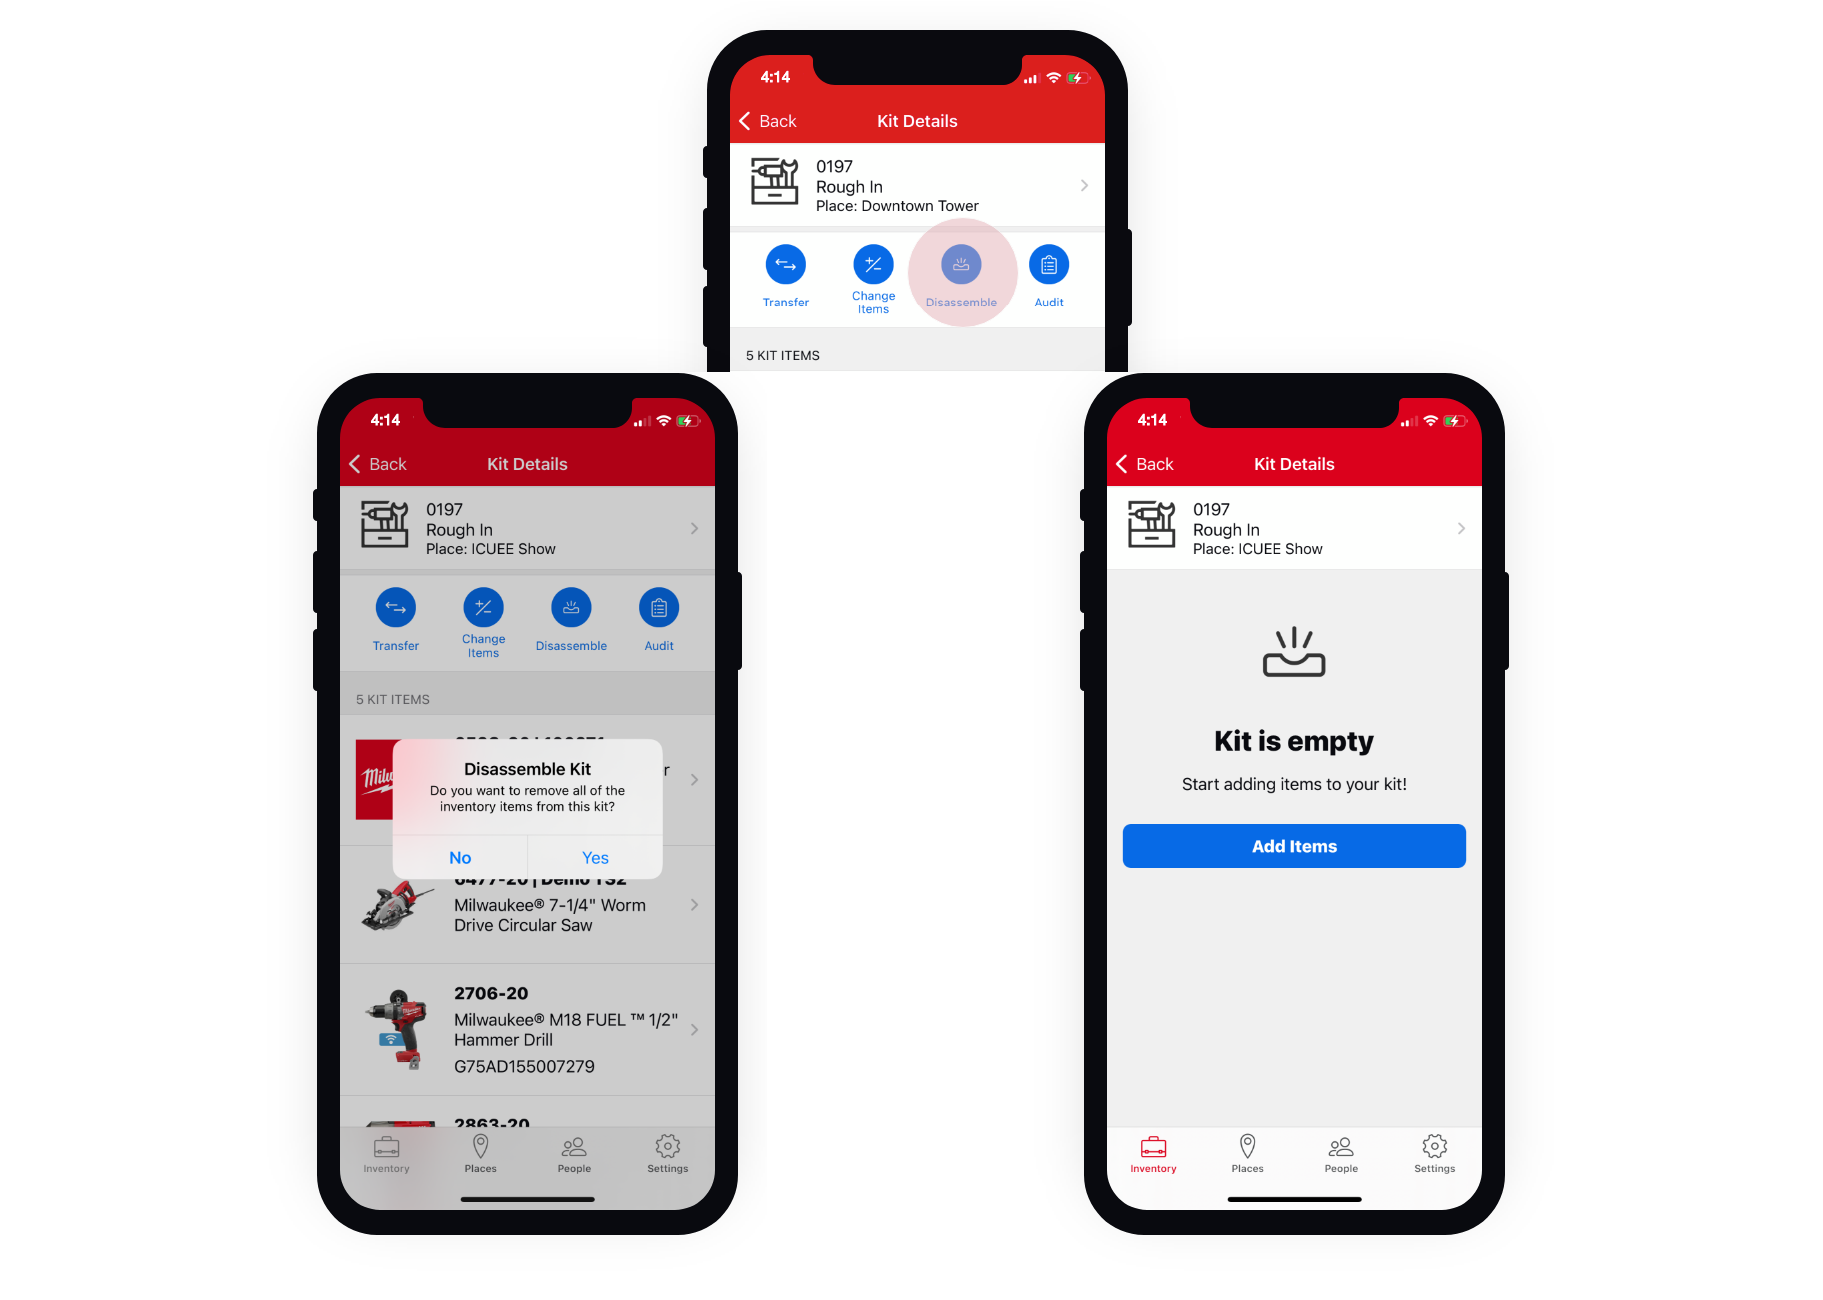
- Finally, if this kit is no longer in use, you can select “Disassemble.”
- You'll be prompted with a question, making sure you are certain you want to disassemble your kit. Tap "YES" if you're sure.
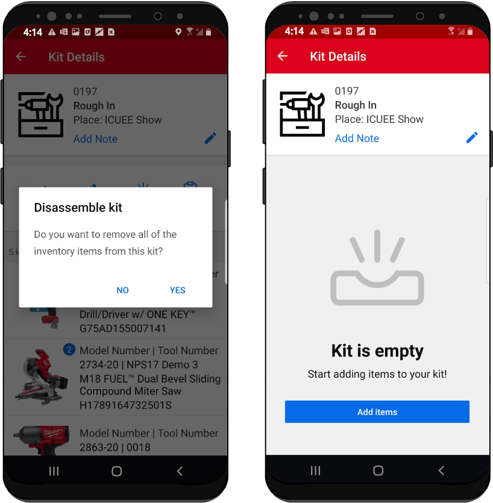
- Your tools will be added back to inventory as unassigned.
Your kit has been disassembled and your items are ready to be reassigned.
How to Create a Tool Kit on iOS
In this section, we'll show you:
1. Navigate to Kits in Inventory
- When you load your inventory on your iOS device, you'll find Kits in the main menu at the top of the screen.
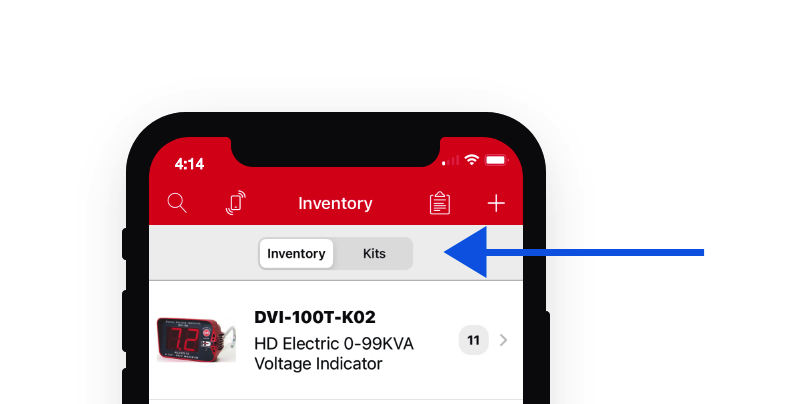
- You’ll now see an option to display either “Inventory” or “Kits.” Tap “Kits” to get started.
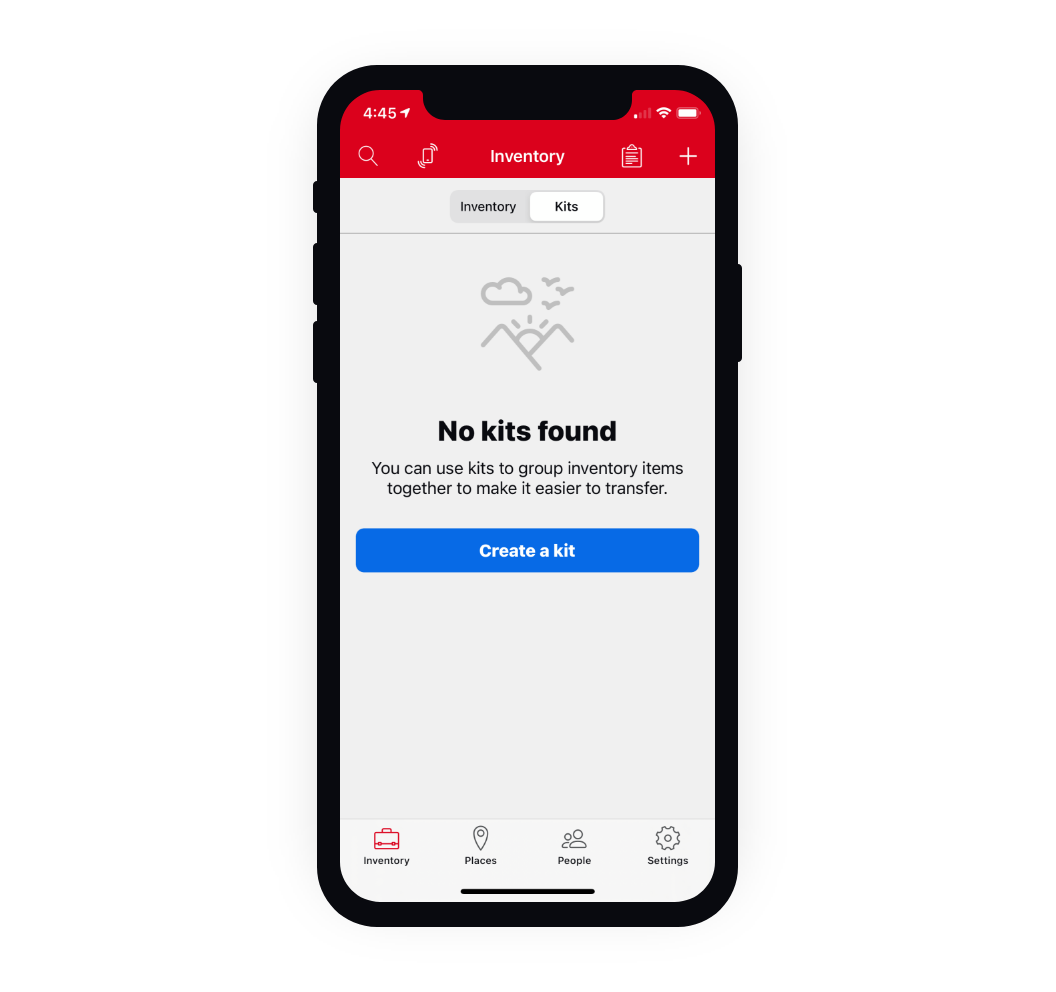
- This is where your kits will live once you’ve built them. To add a new kit, tap “Create a kit.”
2. Create and Manage Your Kit
- To create your new kit, first number your kit. This step is required and can help for easier finding in One-Key later.
- You have the option to enter this number in manually or scan a barcode or One-Key asset ID tag if you have one that you’d like to add to this kit.
-
Next, give your kit a name (also required) and choose the project or job you’re sending it to. Then, tap “Save & Add Items” to start preparing this kit for the job. You can also select "Save and Close" if you'd rather add items to this kit later.
-
You can add items to your kit by scanning their barcode or tag if you’re using them, or you can type the name or model number into the search bar.
- Continue this process until you’ve added all the items you want to add to this kit.
-
When you’re satisfied, tap Save.
-
Your kit now will display when you launch your inventory and select the “Kit” menu.
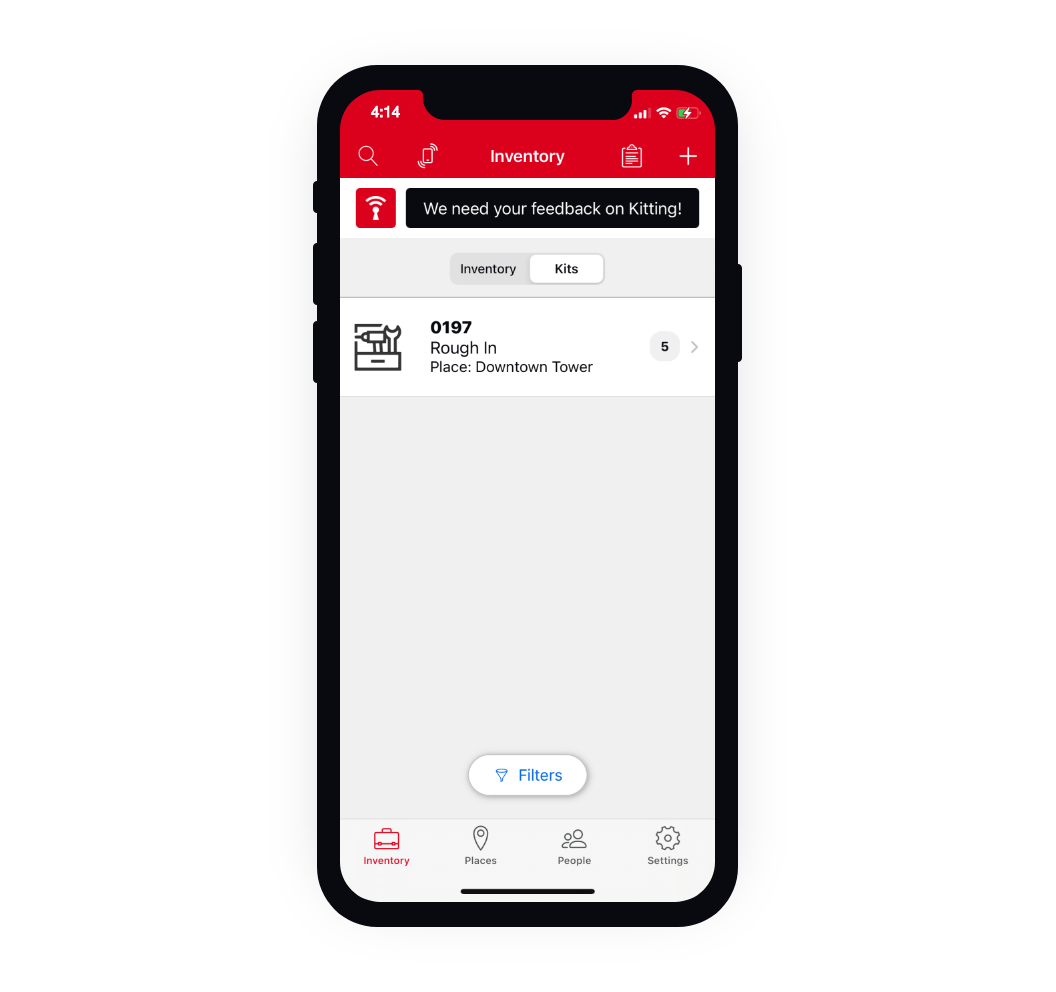
- Tap into your kit to manage it.
-
You can inspect each of your kits to see what’s on hand.
-
If you need rename, edit, or delete this kit, tap on the kit icon at the top of your screen. Here, you'll be able to change your kit’s assigned number or barcode, change its name, or delete it if necessary.
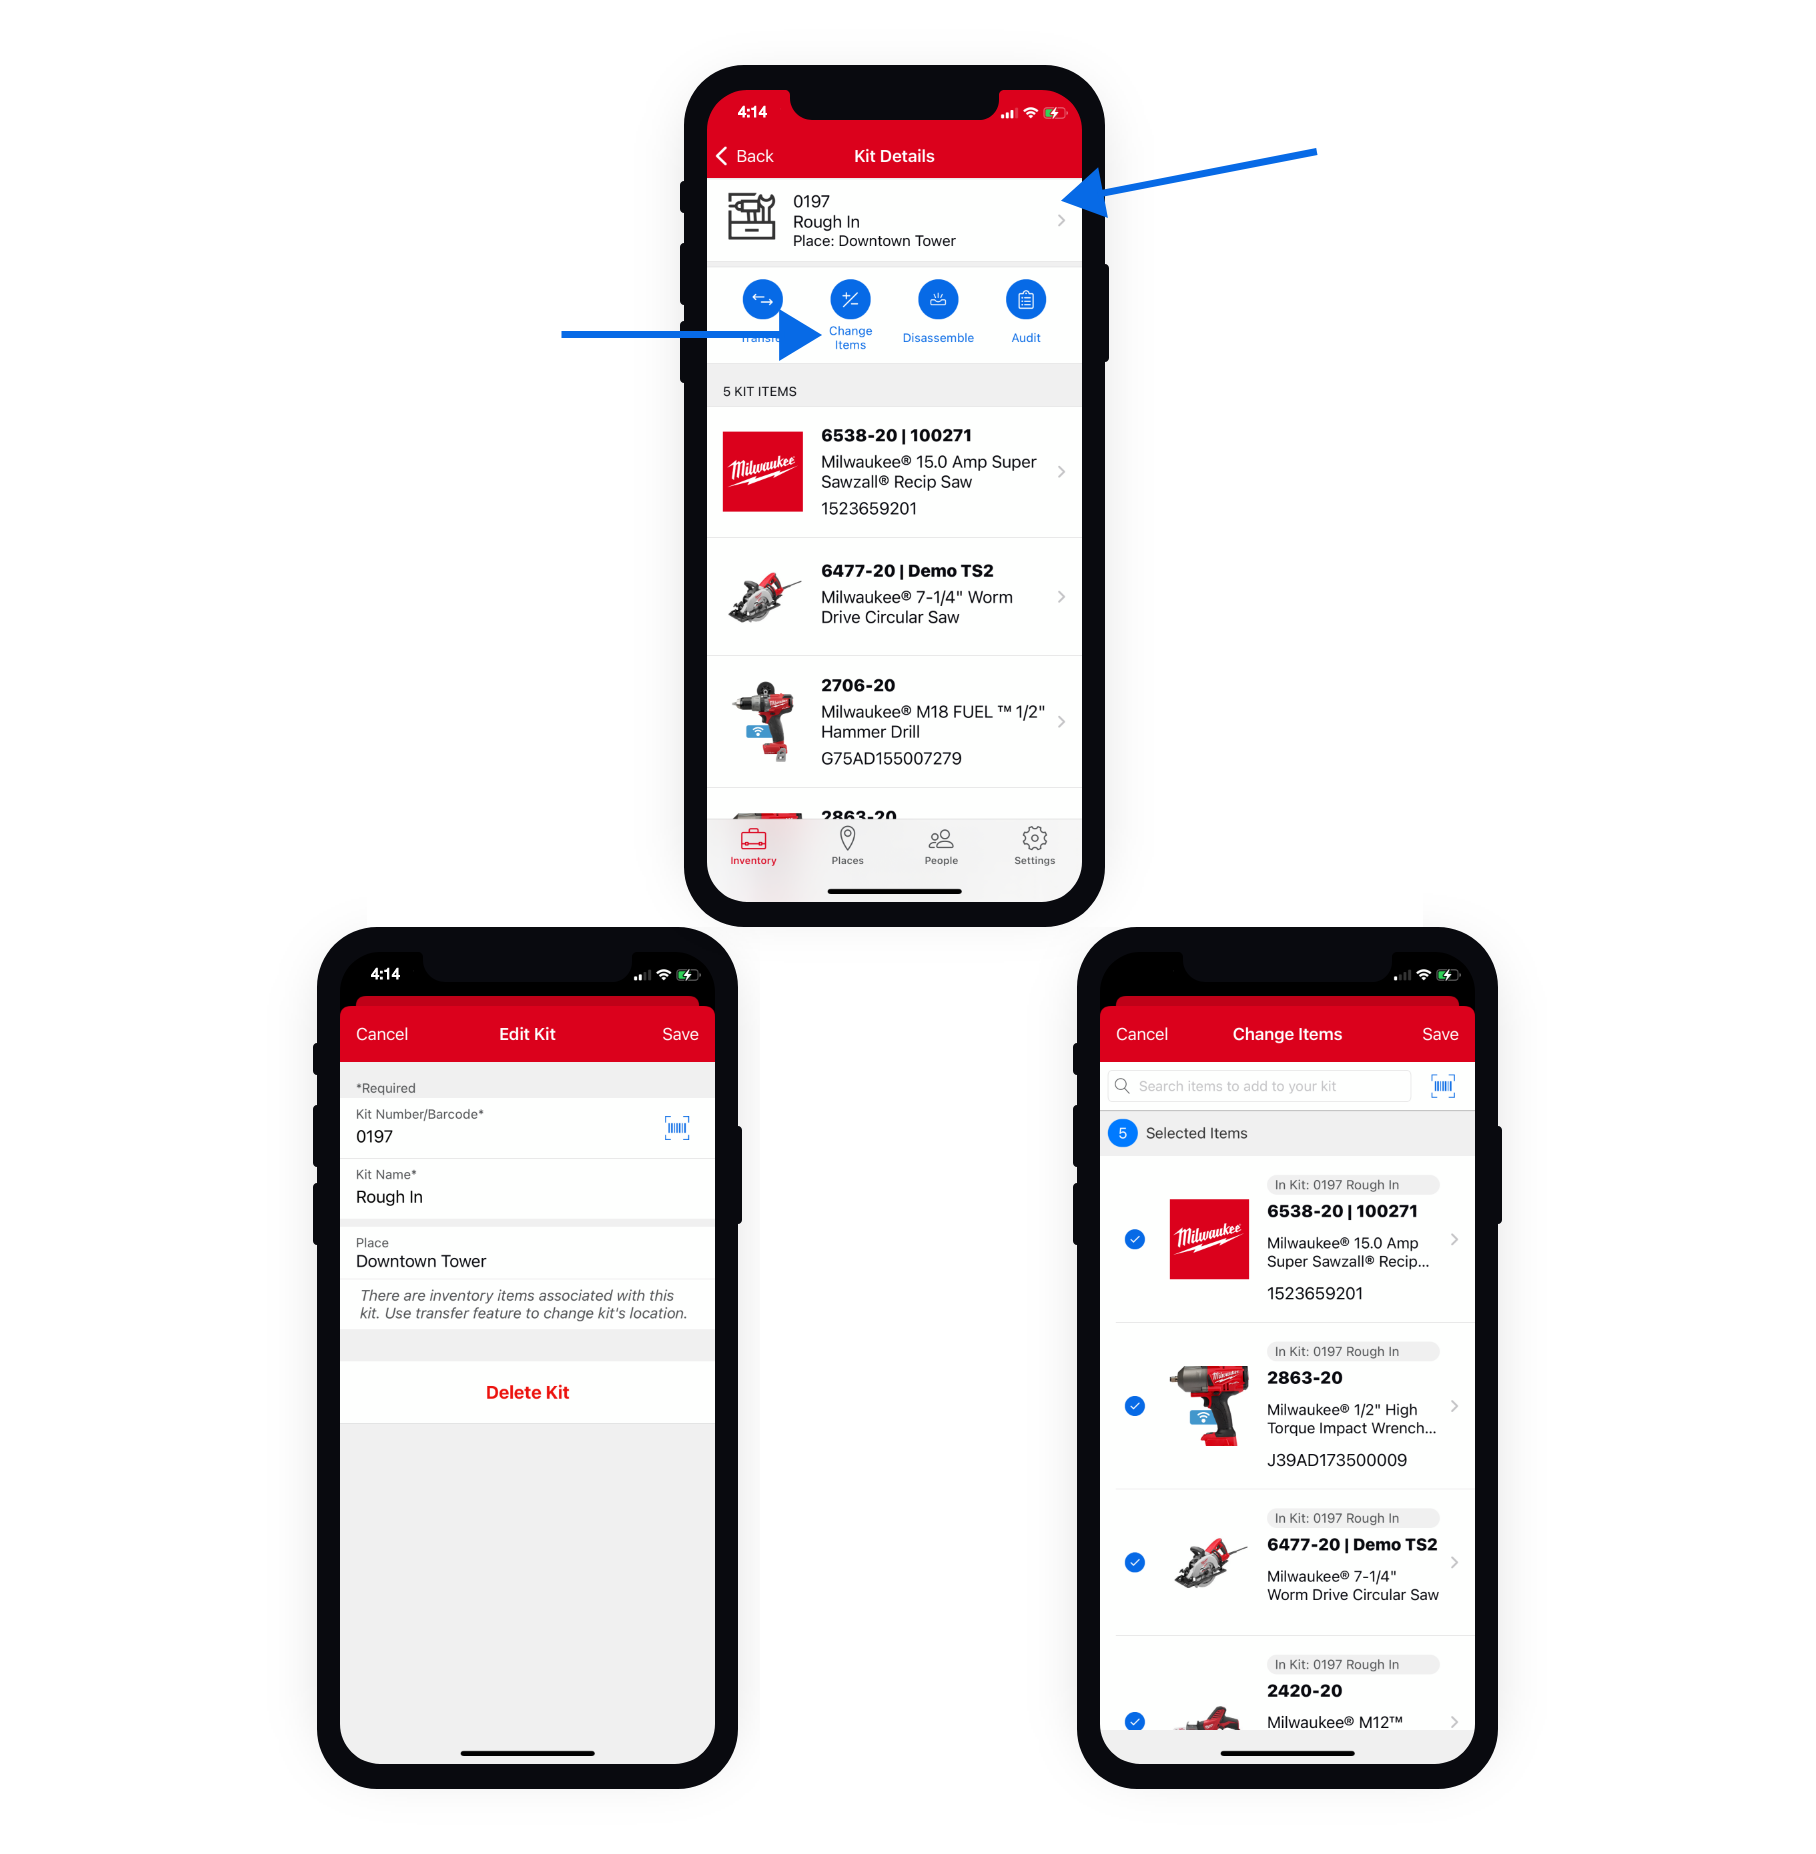
- You can change what's in your kit by tapping into “Change items” to add or subtract items to this kit from your inventory.
-
You can transfer this kit to another job where it might be needed. To do this, tap the “Transfer" button.
- Just select where it’s going. Assign a person, to add accountability. Assign a division to describe the type of work this kit is intended for. Change the status of this kit to reflect that it’s ready for the job or already being used.
-
When you’re done, tap Transfer.
-
You can also download a transfer report to get a copy of this transfer and print it off, or attach it to an email to a team member to verify your tools have been sent.
- You can also make use of the tool kit audit feature. Tap 'Audit.'
- This feature allows you to support accountability in your company by checking in your kit and its contents in real time as it arrives on the job, or at the end of the day or the end of a project to ensure what you started with is what you've ended with.
- Confirm what you have on hand by selecting each item individually. If something that's supposed to be in the kit isn't there, leave it unchecked. You can then send this audit back to the tool team to iron out any discrepancies.
-
Finally, if this kit is no longer in use, you can select “Disassemble.” Your tools will be added back to inventory as unassigned.
Your kit has been disassembled and your items are ready to be reassigned.
How to Create a Tool Kit on Web
In this section, we'll show you:
1. Navigate to "Kits" in Inventory
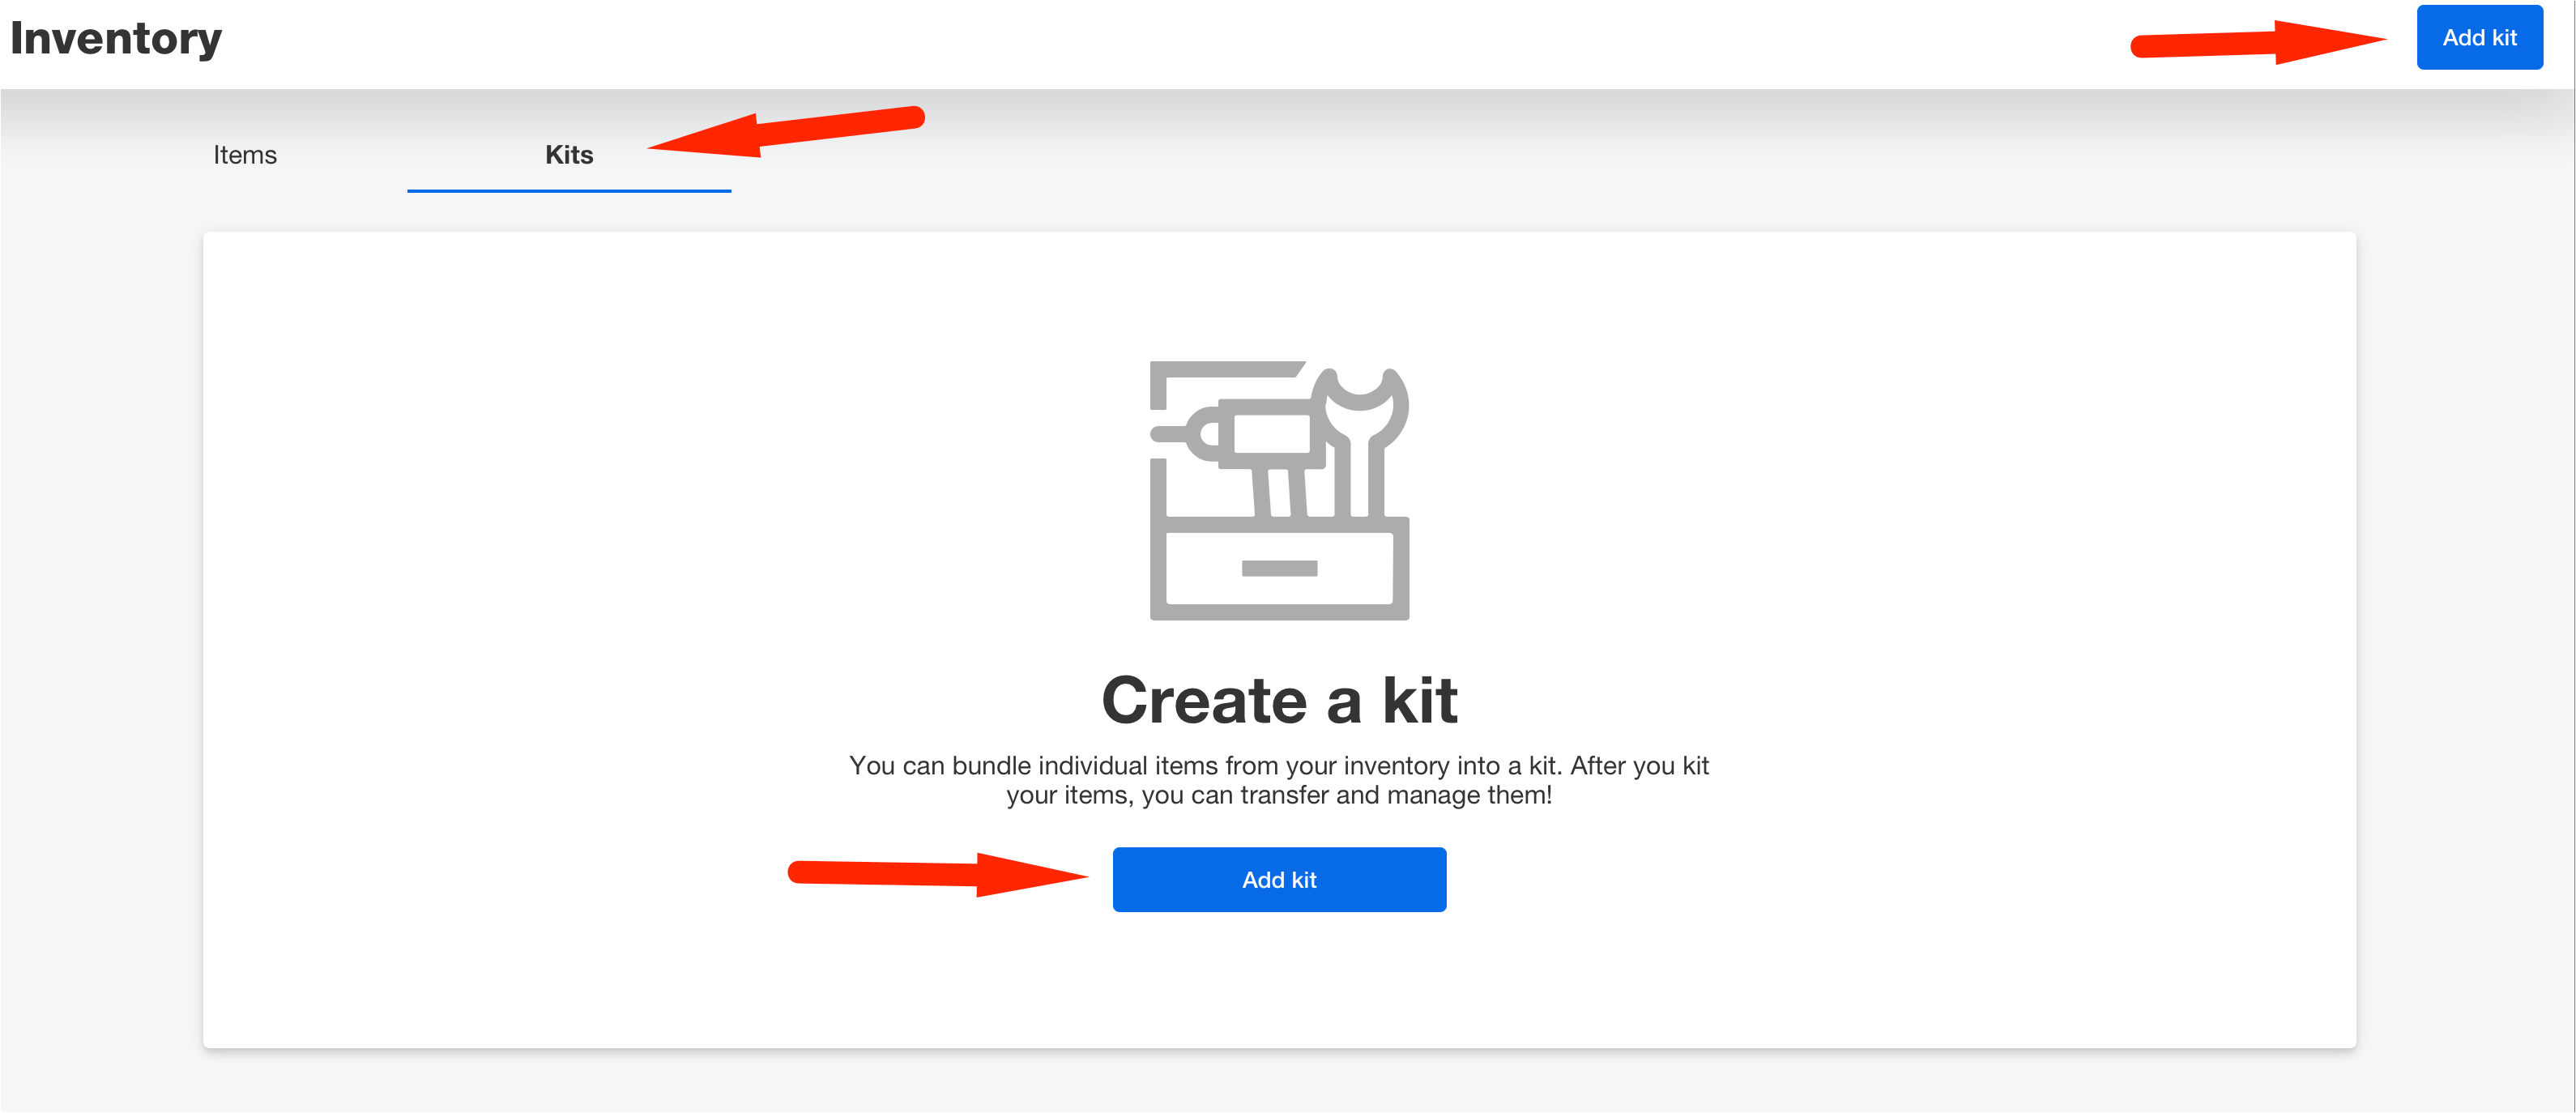
- When you visit the web app on your desktop or laptop computer, you’ll now see an option to display either “Items” or “Kits.”
- Select “Kits” to get started. This is where your kits will live once you’ve built them. To add a new kit, select “Add kit.”
2. Create and Manage Your Kit
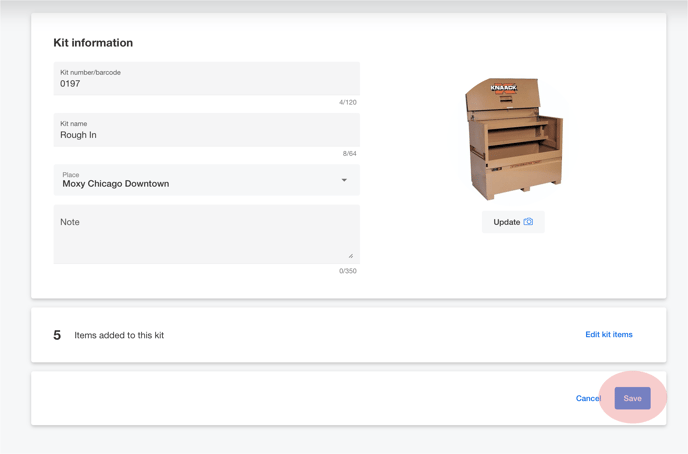
- Get started adding your kit by numbering it. This step is required and can help for easier finding in One-Key later.

-
Next, give your kit a name (also required) and choose the project or job you’re sending it to.
-
You can also add a photo of your kit, such as the job box your Kit corresponds with, for easy identification.
- You can save your kit or first add items to your kit.
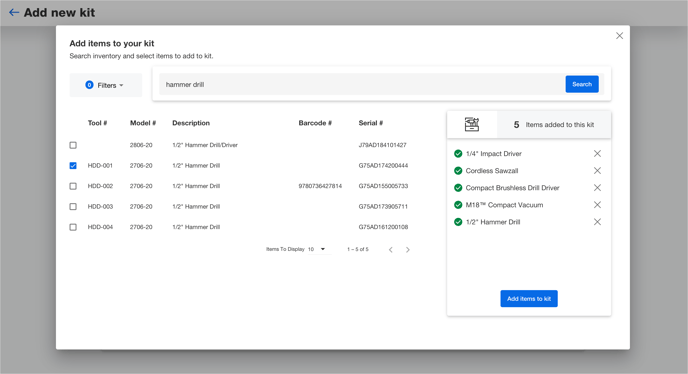
- You can add items to your kit by scrolling through your inventory or typing in the name or model number into the search bar.
- Continue this process until you’ve added all the items you want to add to this kit, then select “Add items to kit.”
- If your kit is ready, select Save.
- You can inspect each of your kits to see what’s on hand.
- If you need rename, edit your kit, select on the overflow button in your kit’s details card. Here, you can manually change your kit’s assigned number or barcode number or change its name. You can also use the overflow button to delete your kit if necessary.
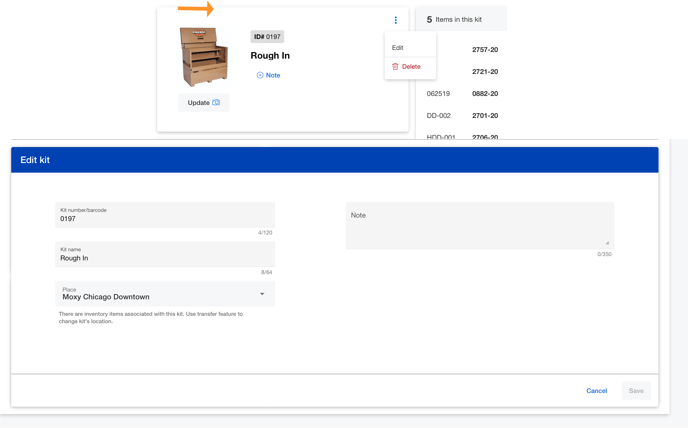 There are a number of options you can select to do with this kit:
- Select “Change items” to add or subtract items to this kit from your inventory.
- Select "Transfer kit" to change where this kit is going. Assign a person, to add accountability, a division to describe the type of work this kit is intended for, and change the status of this kit to reflect that it’s ready for the job or already being used. You can also download a transfer report to get a copy of this transfer and print it off, or attach it to an email to a team member to verify your tools have been sent.
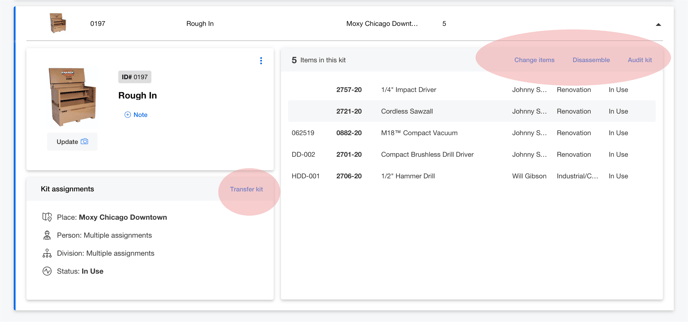
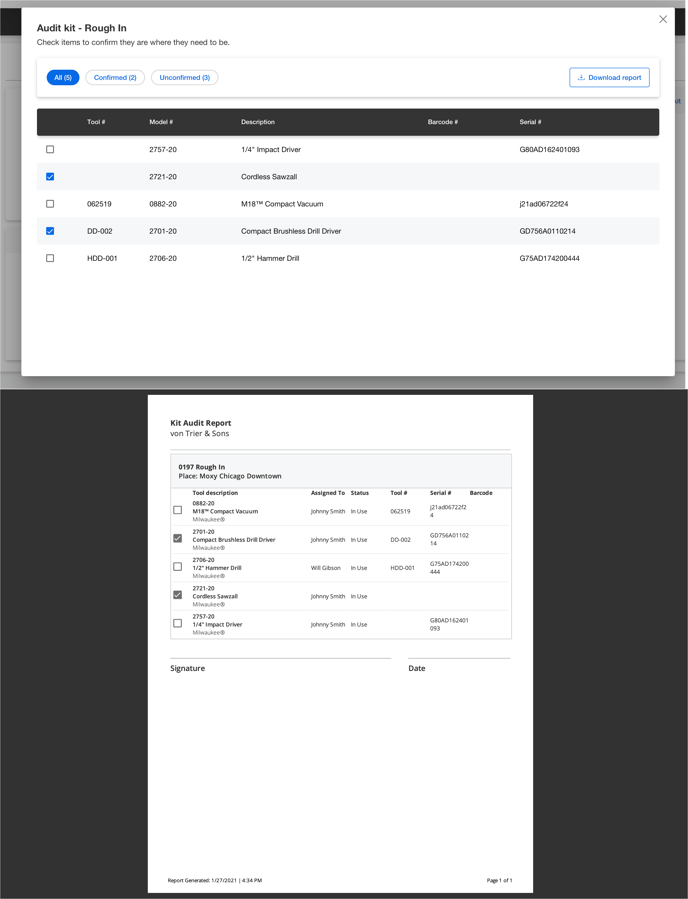
- Select the "Audit kit" button to verify the contents of your kit in real time as it arrives on the job, or at the end of the day or the end of a project to ensure what you started with is what you've ended with. Confirm what you have on hand by selecting each item individually. If something that's supposed to be in the kit isn't there, leave it unchecked. You can then send this audit back to the tool team or project team to iron out any discrepancies.
- Finally, if this kit is no longer in use, you can select “Disassemble.” Your tools will be added back to inventory as unassigned.
Keeping track of groups of tools and equipment that you're sending to the job together is simpler with the tool kitting feature in One-Key.