In this article, we’ll show you how to create an alerts report using the One-Key website.
Getting Started on Web
- Launch the One-Key web app and log in.
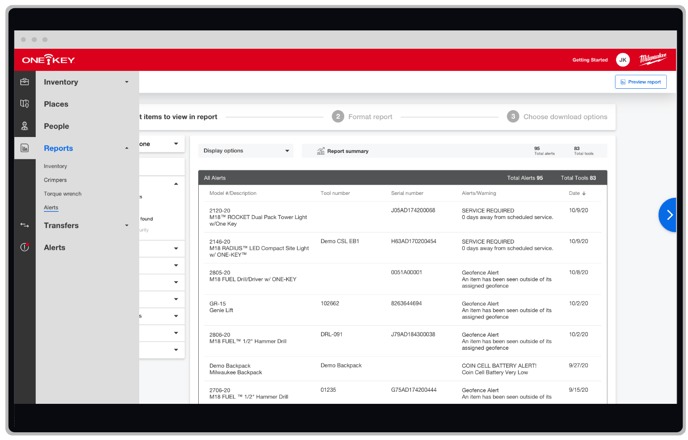
- Your Inventory Dashboard will load by default. Along the left side menu, select “Reports,” then “Alerts.”
Build Your Report
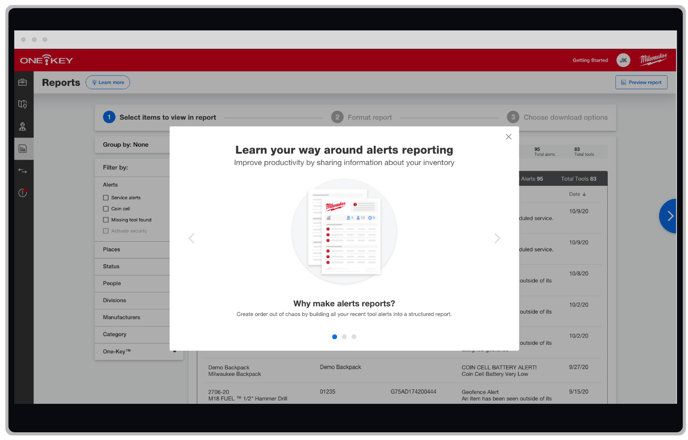
- The alerts report builder will load. Click "Learn More" to get some basic information about the alerts report feature.
- To get started building your report, select what you want to include in your report by selecting filter options along the left-hand side of your screen.
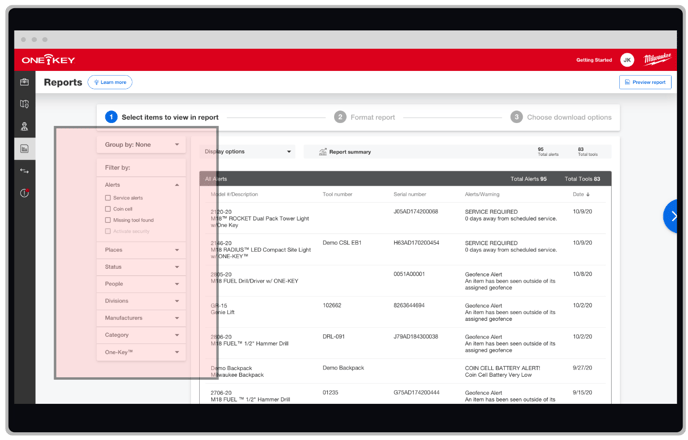
- You can select “Group by” to quickly sort the items you want to show in your report, such as by alert type.
- You can then “Filter by” the type of alerts you want to display, like items that need to be serviced,
- by the places where your items need attention,
- by the statuses on your assets,
- by people to whom your assets with alerts are assigned – so you can quickly establish accountability,
- by the division to which your items with alerts are assigned
- by specific tool manufacturer
- by category of tool, like crimpers or impacts
- and by whether your item is ONE-KEY™ compatibility or TICK’ed
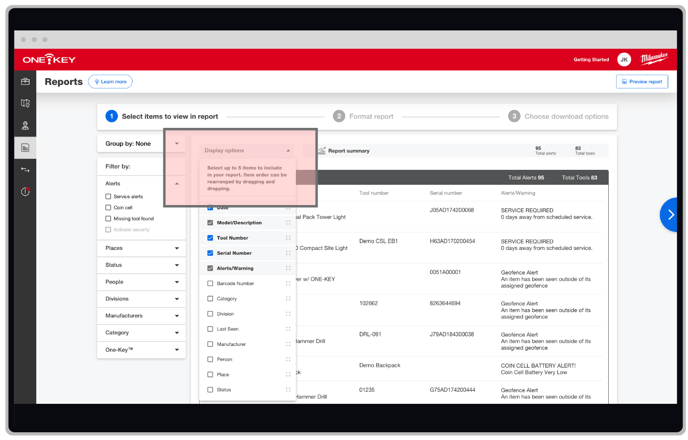
- You can also use the “Display options” to change the order in which your columns are presented in your report. Just choose an item, such as if you want your items to be displayed by date, and drag and drop it to your preferred order.
Formatting Your Report
- Once your selections are made, tap step 2, "Format report," to move on to formatting.
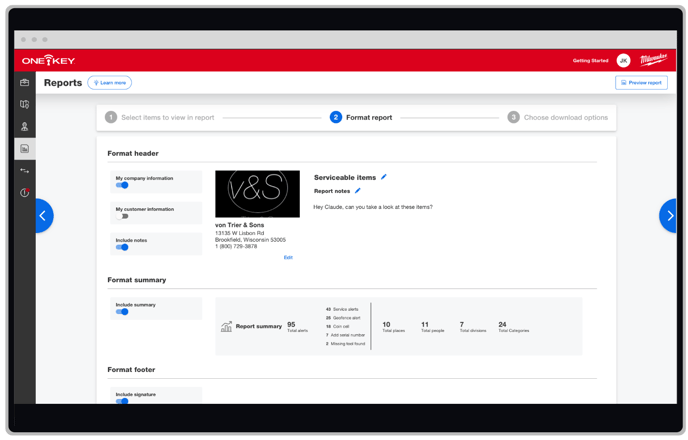
- Toggle “My company information” on and click “Edit” to add you company name, address, the city and state you’re located in, postal code, and zip. For personalization, you can also add your company logo so it displays at the top of your report.
- Toggle “My customer information” on if you’re building this report for a customer you work with. Or you can leave it off if the report is for internal use.
Additionally, you can rename your report by selecting the blue pencil at the top of your report builder. - Toggle on “Include notes” to insert any clarification to this report in the provided text box, such as adding a quick message to a customer or teammate.
- Toggle on “Include summary” to give a quick overview on your report with high level stats.
- Finally, toggle “Include signature” if you want to include a signoff where a team member can verify receipt.
Choose Download Options
When your selections are made, move on to step 3, "Choose Download Options," to save your report.
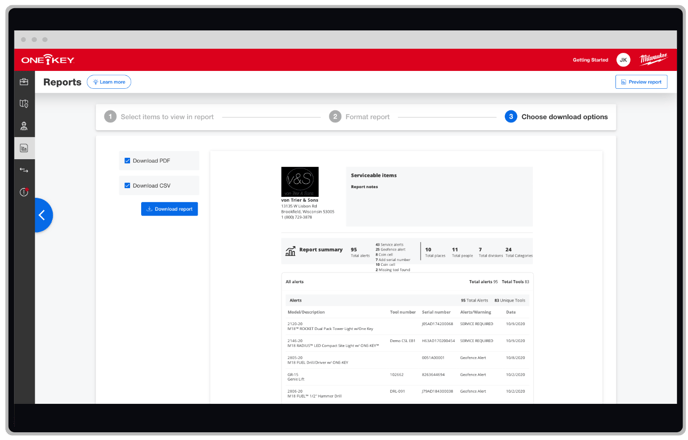
- Here, you’ll get a preview of what your report looks like. If it looks good, select either “PDF or CSV” file format, and make sure to click “Download report” to ensure your report will save to your computer. Print this off and provide to a team member or attach to an email for convenience.
There you have it. Your report is built.
With alerts reports, feel empowered to build transparency across your operations and keep everyone that needs to be abreast on what’s going on with your inventory.