With ONE-KEY™ geofencing, you can set up virtual boundaries around any of your jobsites. This virtual fortification comes in handy when tools stray beyond their chosen path and you want to retrace their steps.
But with operations constantly adapting, you might find you need to adjust or delete the geofence you've set up. In this article, we'll show you how to edit or delete geofences via the One-Key mobile and web-based apps.
You can select any of the below bulleted items to be taken to the corresponding section of this article where we discuss each of them:
How to Edit or Delete Geofences on Android
Note: The screens featured in this article may appear different than what you see on your device due to different phone manufacturers having different procedures.
It’s easy to edit or remove geofences from any project or jobsite in One-Key.
In this section, we'll be covering:
1. How to edit a place's geofence
-
To get started, launch the One-Key mobile app on your Android device and then tap "Places" along the bottom navigation.
-
Find and select the place whose geofence needs rezoning.
-
Tap the map in your place’s details.
-
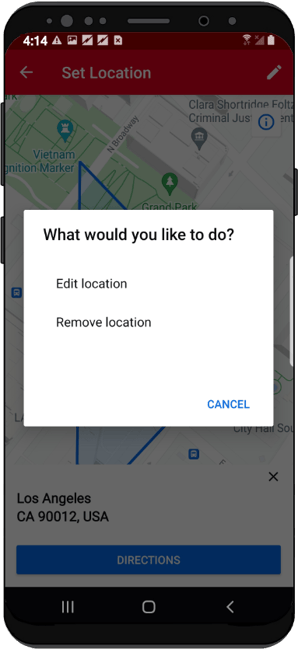
Tap the white pencil at the top righthand corner of your screen, then tap “Edit location.”
-
Click and drag the white perimeter buttons to redraw your geofence to your new specifications.
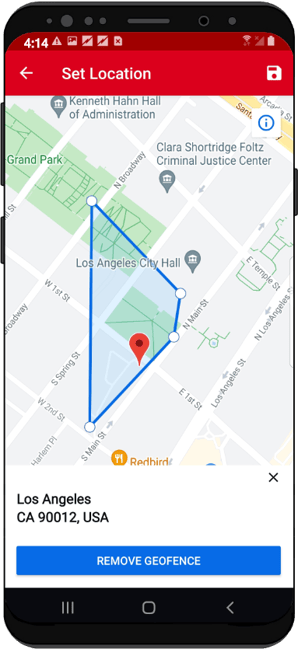
- Tap the save button to log this updated geofence to One-Key.
Your geofence has been saved and will now display in your item's details.
2. How to Remove a Project's Geofence
Now, suppose you want to remove your place’s geofence entirely. That’s simple enough.
- Launch the map from your project's detail page.
- Tap the white pencil button at the top righthand corner of your screen, then “Edit location,” and then “Remove Geofence.” Finally, tap the save button to log this change to One-Key.
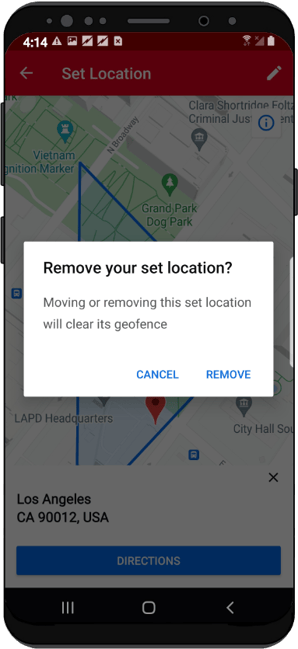
Your geofence has been removed.
How to edit your geofence on iOS
If you have a geofence already in place, you might find you need to change its boundaries, whether your project's scope or simply its address, has changed. Adjusting your place's geofence to accommodate these new geographical requirements is easy.
In this section, we'll show you:
1. How to edit your geofence
-
Select the places icon from the bottom navigation bar
-
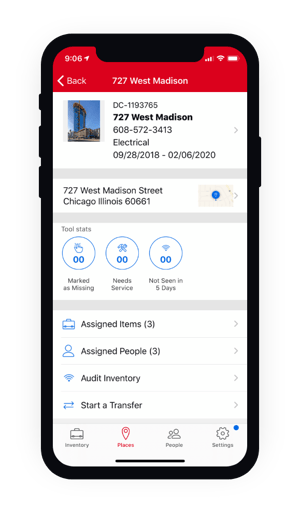
Select the place with the Geofence you want to edit.
-
Under the place’s details, select the > icon next to your place's location information.
-
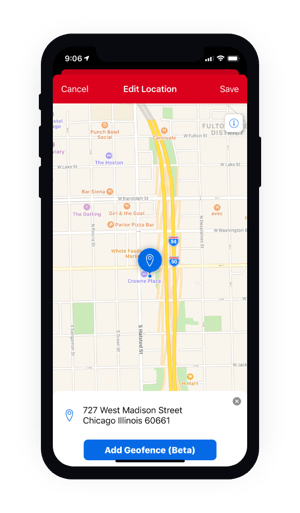
A map with your current geofence will load.
-
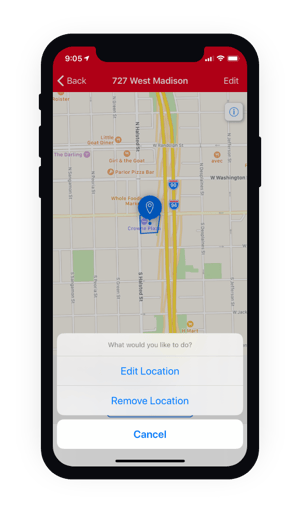
Select “Edit” in the upper right corner, then select "Edit location."
-
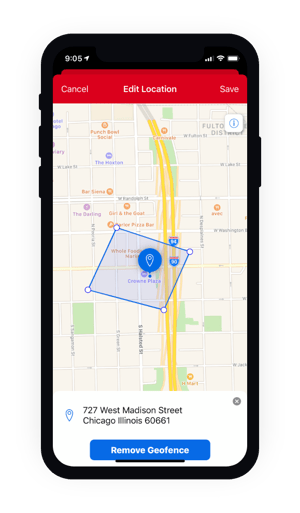
Edit your geofence by adjusting the corners.
-
Once you’re satisfied, click "Save" in the upper right corner.
Now, the new boundaries you’ve drawn as your place's geofence will show in the map next to your place's address.
2. How to delete your geofence
-
Select “Edit” in the upper right corner, then select “Edit location.”

-
Under the location’s address, tap the blue “Remove Geofence button” button.

-
Tap “Save” in the upper right corner.
-
You have now deleted your Geofence.
Your geofence will no longer display in your place's details.
How to Adjust your Geofence on Web
Your operation may grow over time, be it an expanding job site or a thriving home base. If you have a geofence already in place, you need to know how to change its boundaries.
In this section, we'll show you how to:
1. How to Edit Your Geofence
-
Start at the Inventory Dashboard and hover your cursor over the map icon on the left side of the screen. The navigation bar will expand, revealing a list of options. Click “Places.”
-
From your list of places, click on the place whose geofence you wish to adjust.
-
On the left side of the screen, you should see a small map of your selected place. Beneath the address, click “EDIT.”
-
The map will enlarge to fill the screen. From here, you can adjust your geofence by clicking and dragging the perimeter buttons into your desired shape.

5. Make sure you click the blue “Save” button in the bottom right-hand corner of the map when you’re finished adjusting the geofence.
Now your geofence will conform to the new boundaries you’ve drawn.
Back to Top of Section
2. How to Delete Your Geofence
If the situation calls for it, you also need to know how to delete your geofence entirely.
-
Start at the Inventory Dashboard and hover your cursor over the map icon on the left side of the screen. The navigation bar will expand, revealing a list of options. Click “Places.”
-
From your list of places, click on the place whose geofence you wish to delete.
-
On the left side of the screen, you should see a small map of your selected place. Beneath the address, click “EDIT.”
-
Now click on the blue “Remove geofence” button in the set location box displayed in the upper left-hand corner. Your geofence will disappear from the map.
-
Make sure you click the blue “Save” button in the bottom right-hand corner of the map when you’re finished.
Now your geofence is deleted.
Whether it involves geofencing or another of the app’s features, One-Key enables you to make the adjustments you need as the situation on the ground changes from one job to the next.